

The combination of React and Firebase can move web applications to a whole new level. In this workshop, you will create an awesome full-stack To-do App using React for front-end and Firebase real-time database as back-end. By the end of this workshop, you will learn about Forms in React and implementing CRUD operations using Firebase.
We are going to build something similar to this. 👇
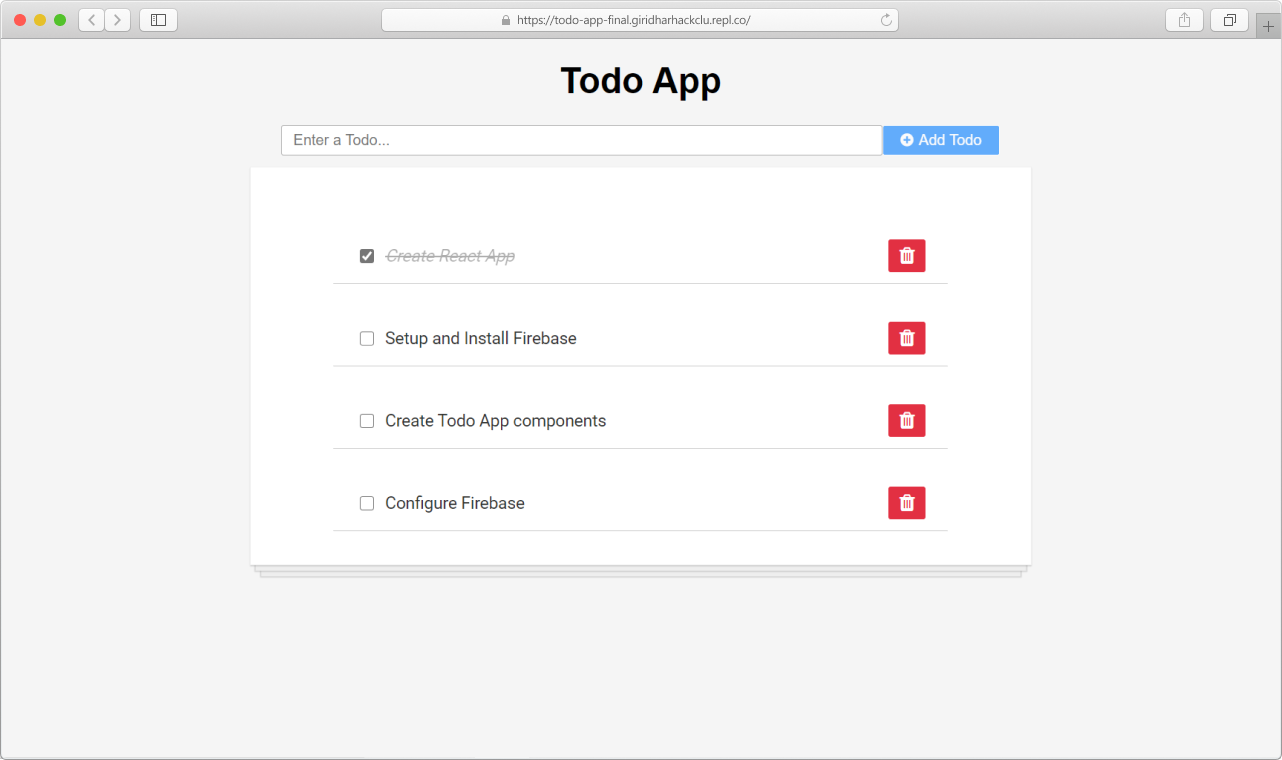
Check out live demo and source code.
This workshop should take about an hour to complete.
Prerequisites
- You should have a basic understanding of HTML, CSS, and JavaScript.
- You should also know some concepts of ES6 features of JavaScript.
- You should be familiar with the fundamentals of React and React Hooks.
- It's also good if you have a little bit of knowledge about Firebase. But don't worry, we will cover everything from scratch.
Coding Environment
We will be using Repl.it for building our project. Repl.it is an online code editor where you can code in different languages without any installations.
Fork this starter repl here.
It contains create-react-app and firebase installed. It also contains all the styles required so that we can focus only on React and Firebase.
After forking, press the Run button on the top. If you output something like this, you are good to go.

Creating a Firebase Project
You can access Firebase with your Google account.
Firebase: Google's Firebase is Backend-as-a-Service(BaaS), which makes us easy to add a back-end to our applications with some knowledge of server-side coding.
We are going to use Firebase Realtime Database as a database for our Todo App.
The Firebase Realtime Database is cloud-hosted. Data is stored as JSON and synchronized in real-time to every connected client. We can store and sync data across all clients in real-time and remains available when your app goes offline.
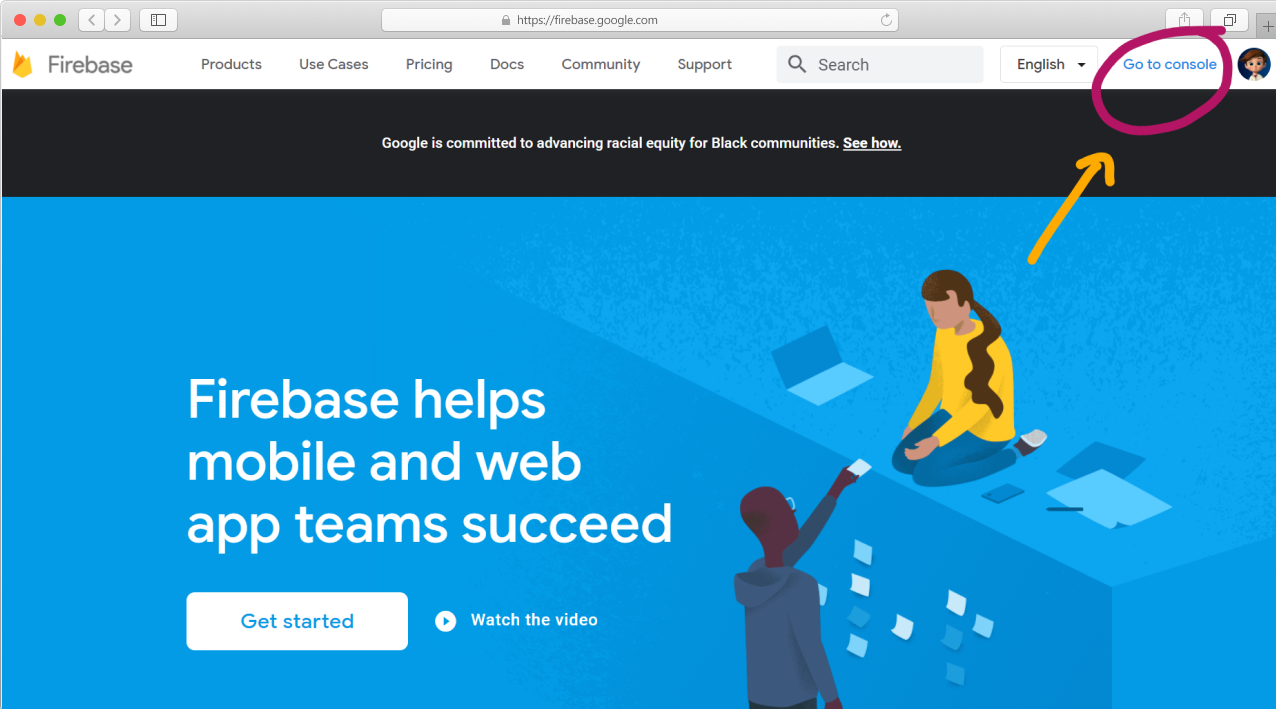
Open Firebase; after signing in, click on Go to console on the top right corner.
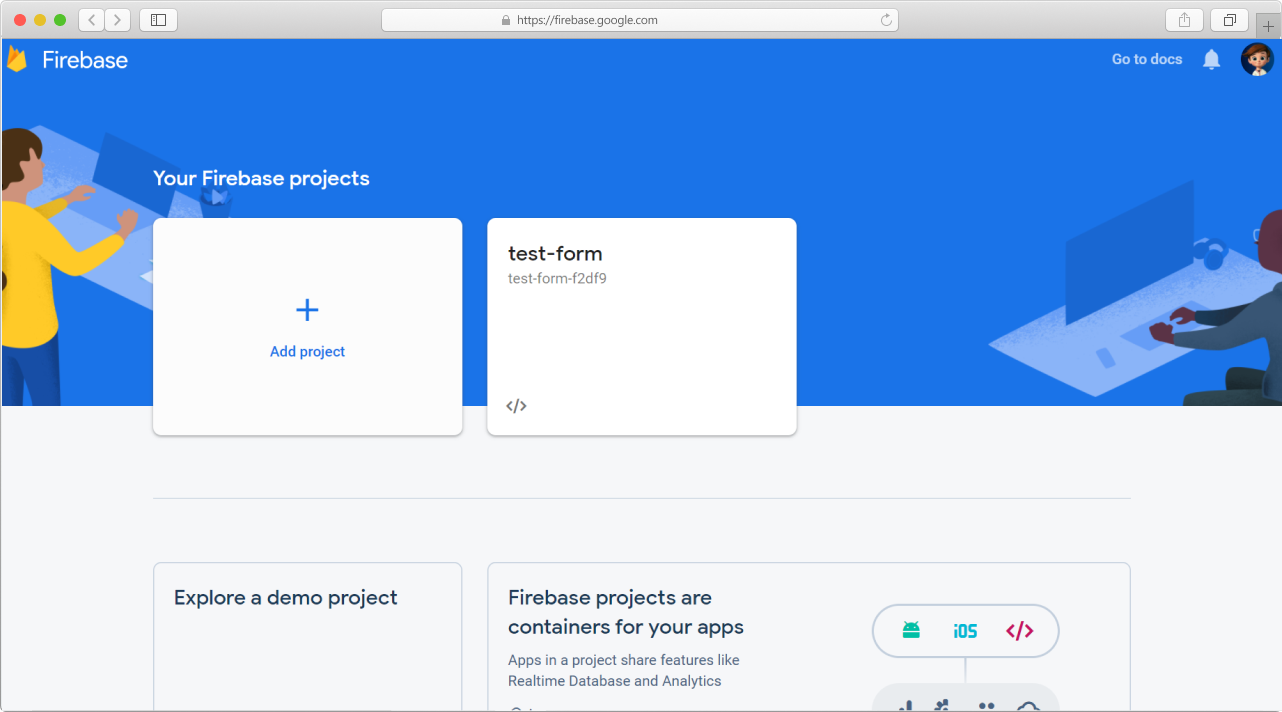
In your console, If you don't have any projects yet, it will be clean and empty. Click on Create Project to add a new project.
Complete all the steps to create a firebase project. Name your project as you wish.
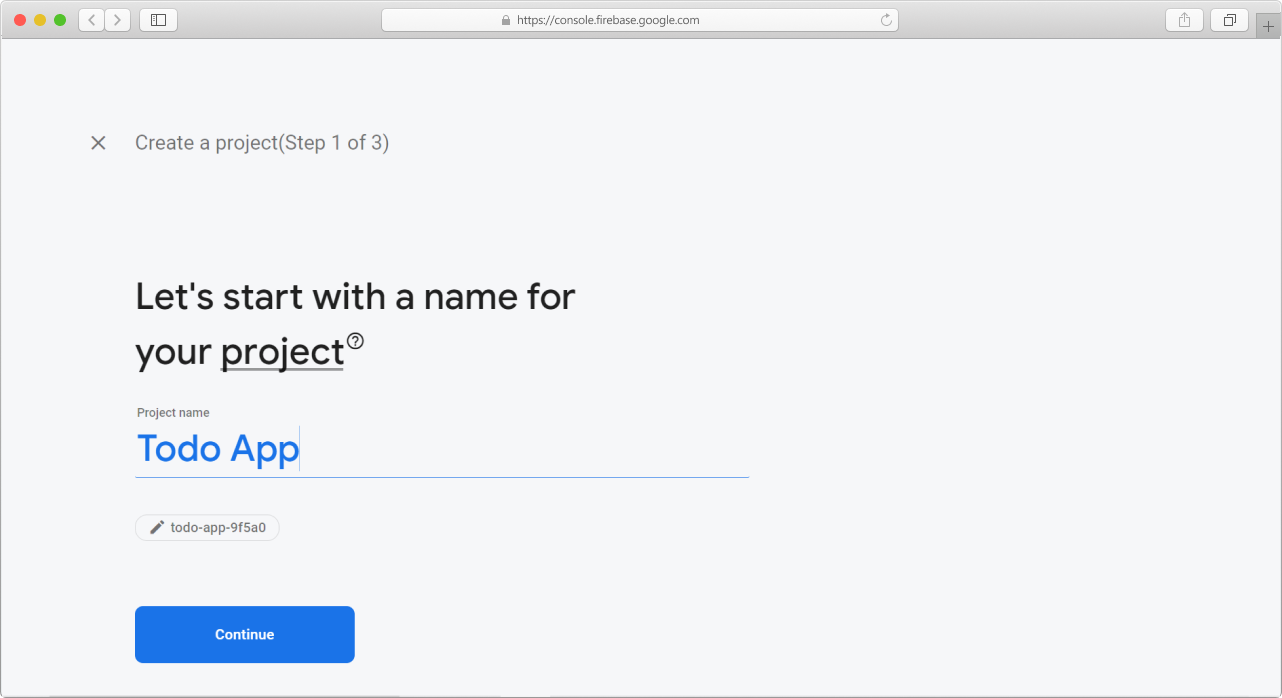
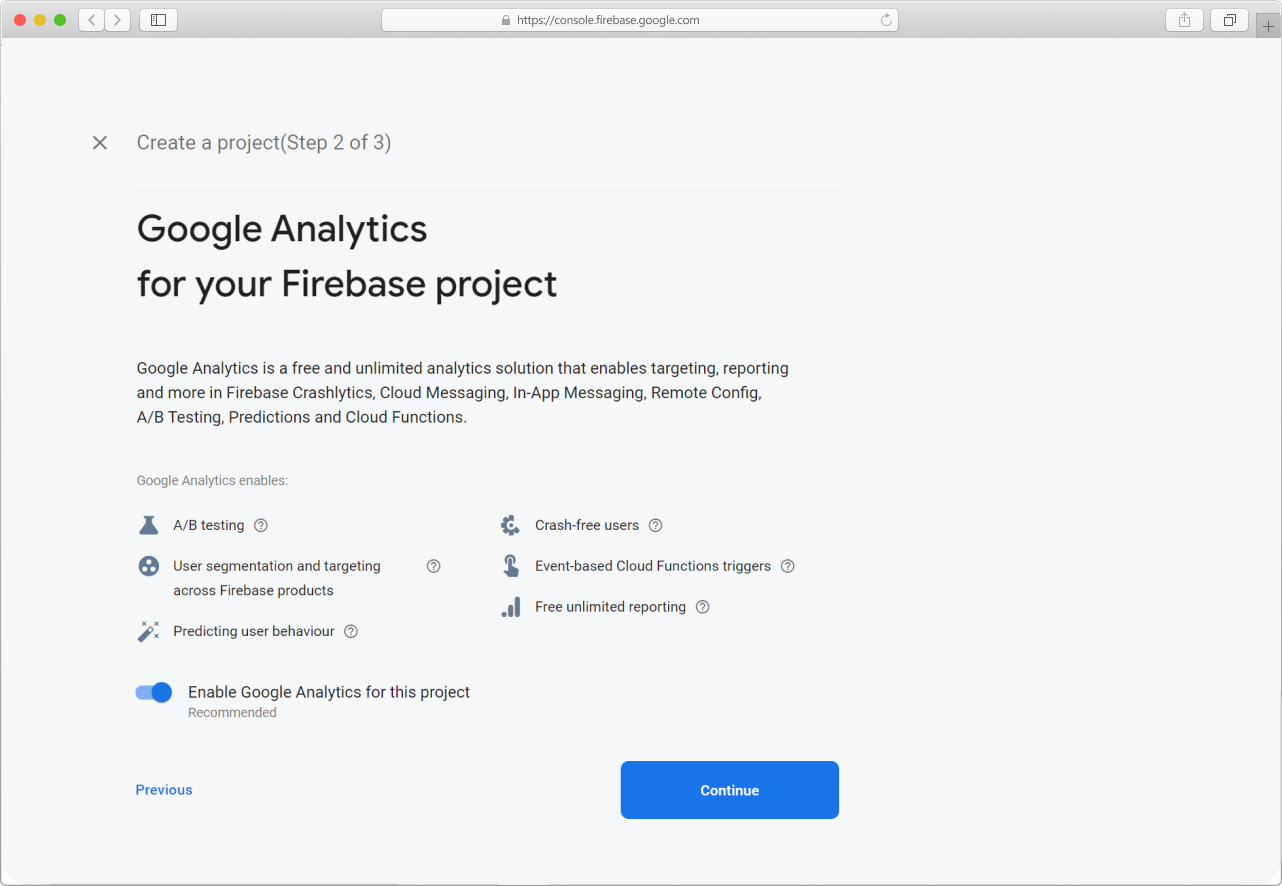
After giving a name to your project, click the Continue button to proceed further. Here is an optional step to use Google Analytics for your project, but you won't need it in this workshop. Click on Continue.
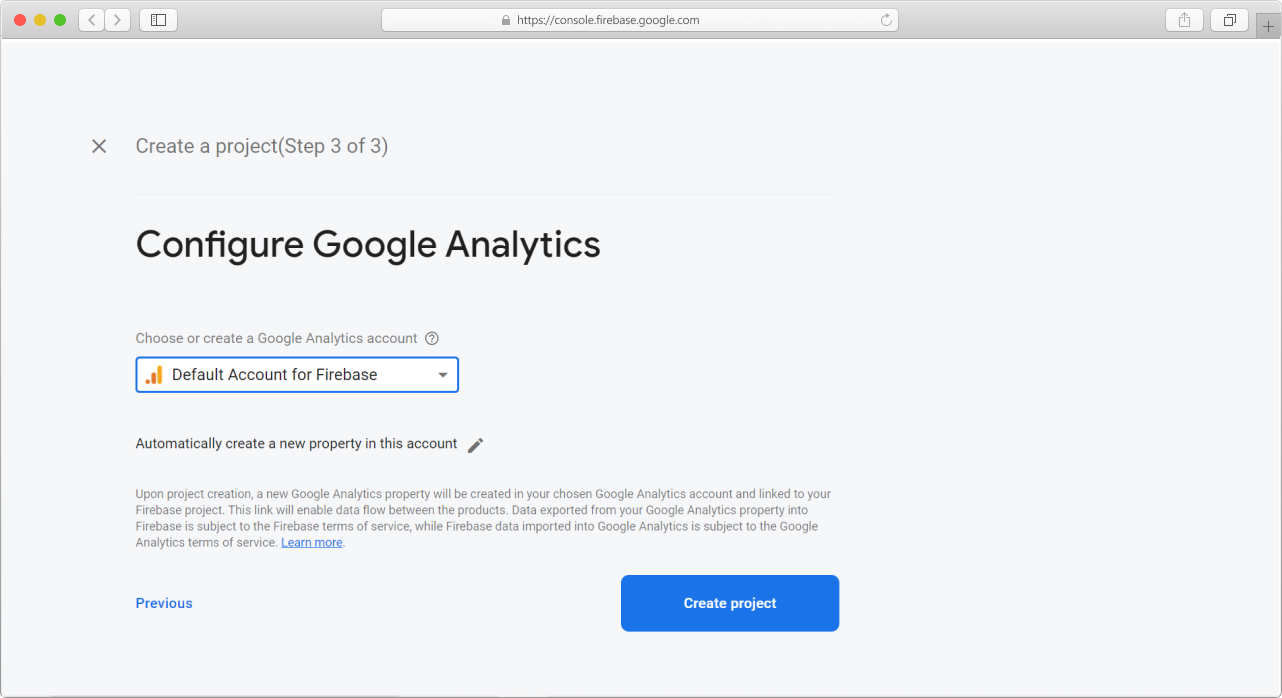
Finally, hit Create Project.
🎉 Bingo!!! Your Firebase project will be created. You should see something like this.
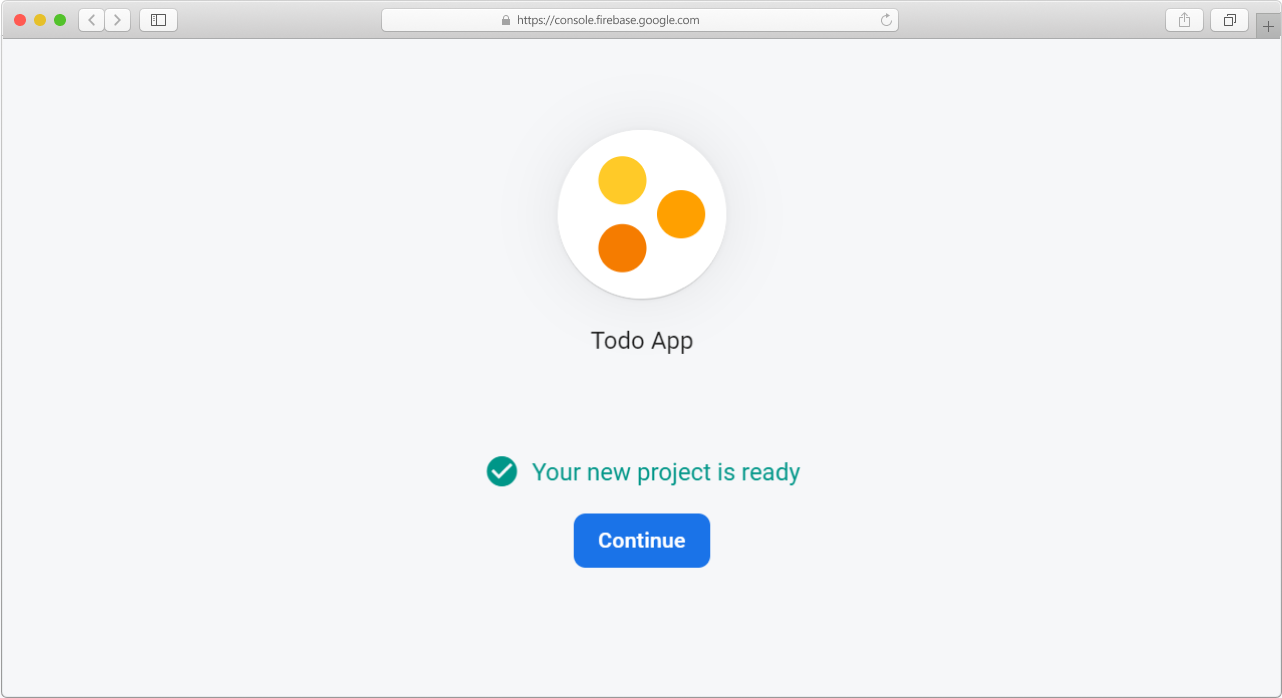
Click on the Continue button.
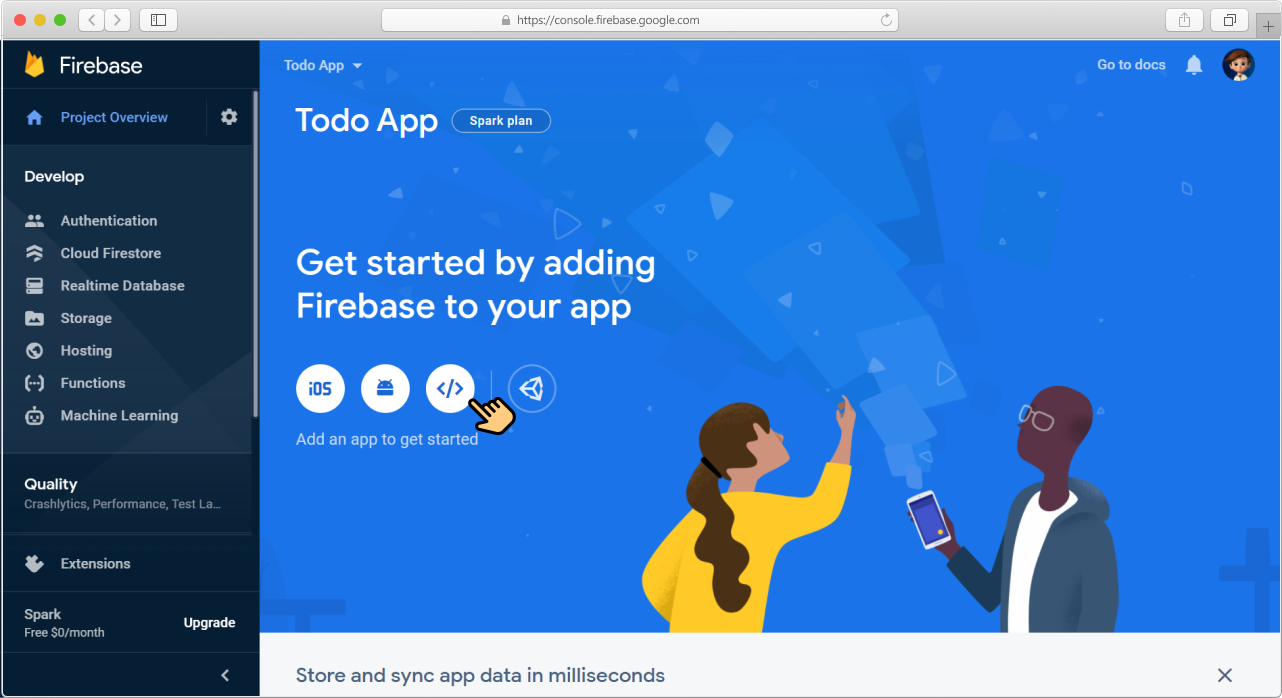
Then let's configure our Project with Firebase.
Configuring Project with Firebase
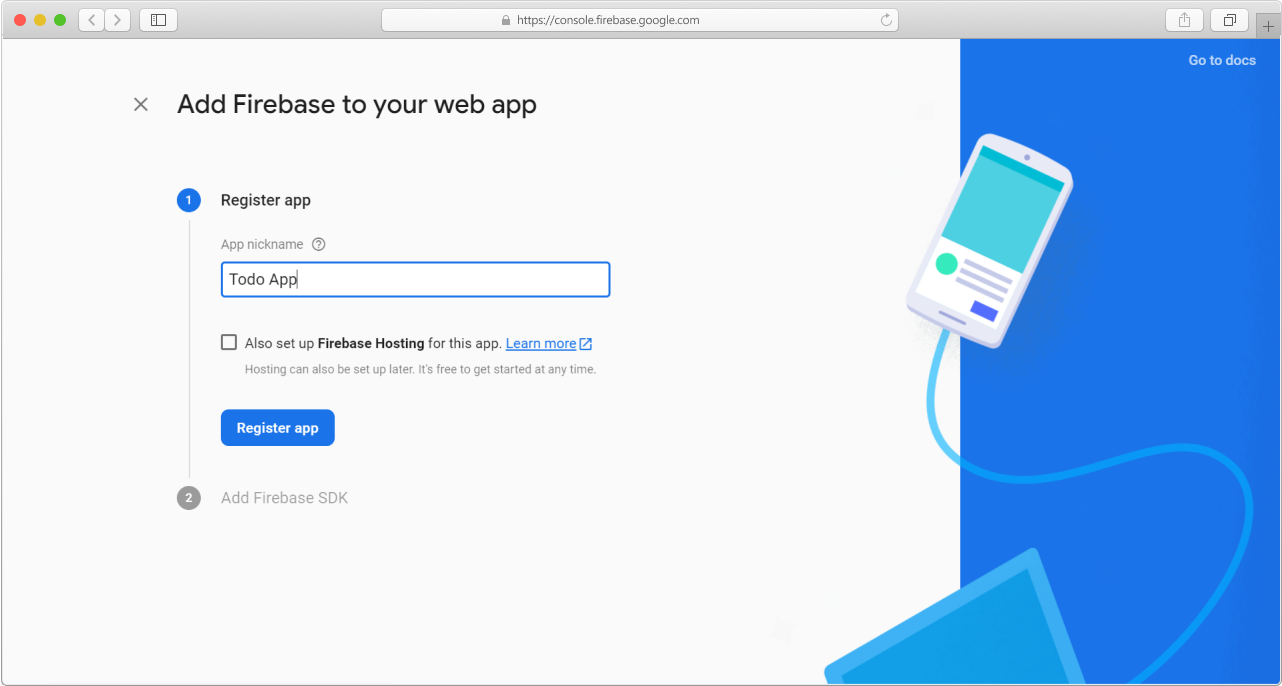
Click on the Web (</>) icon.
Register your project with a name.
Here are your app credentials. This code helps your project connect to your Firebase project.
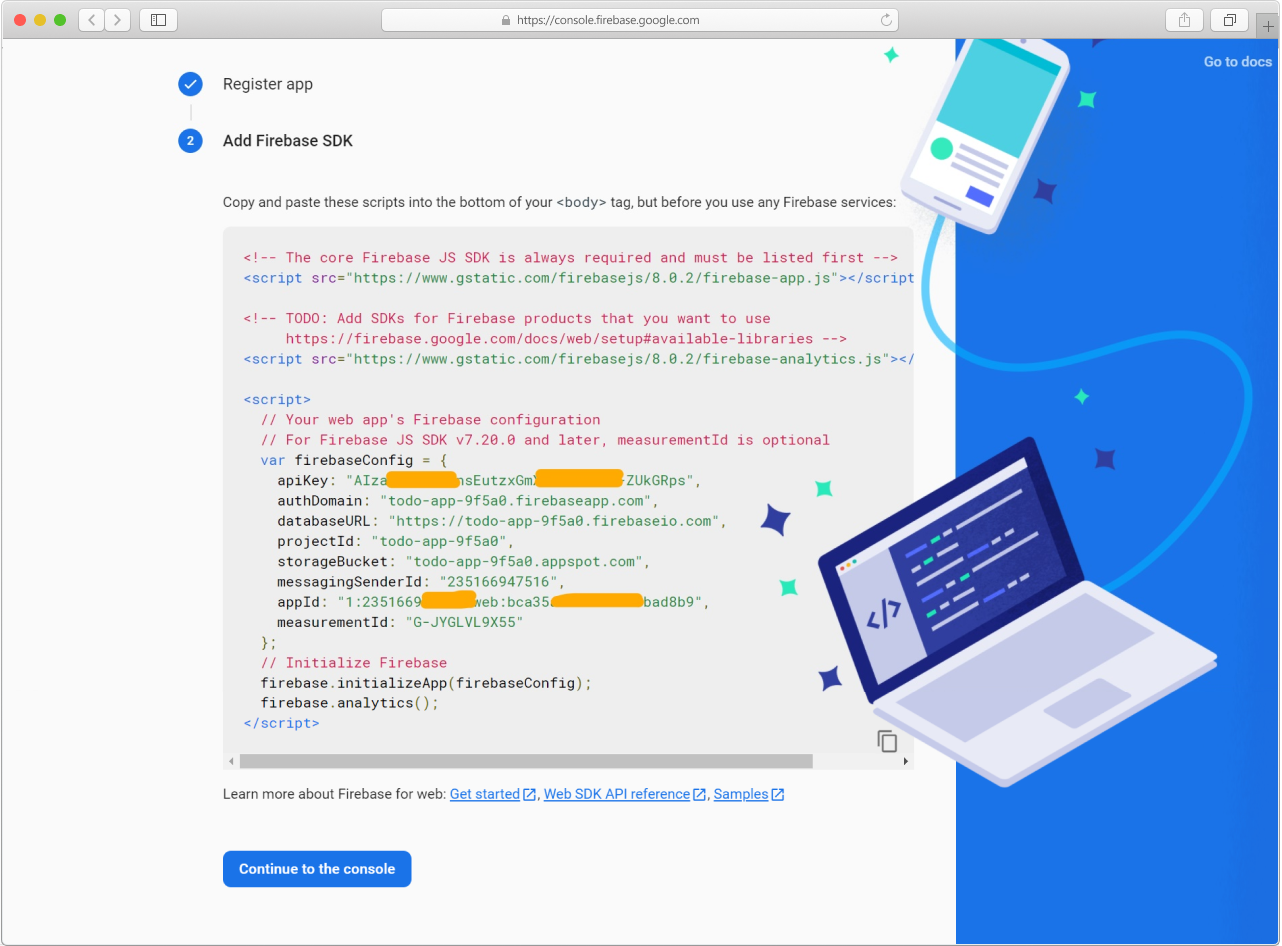
Make sure you copy your web app's Firebase configuration(firebaseConfig object).
Hop on to the forked Repl and create a new component, Firebase.js inside the src folder.
In the Firebase.js component, import the firebase module, which is already installed, and paste the data you copied from Firebase. Your Firebase.js file will be like this with your API keys.
import firebase from 'firebase' // <–– importing firebase

var firebaseConfig = {
    apiKey: "AIzaSyCFg0consEutzxGmXo5zxcibJ2-ZUkGRps",
    authDomain: "todo-app-9f5a0.firebaseapp.com",
    databaseURL: "https://todo-app-9f5a0.firebaseio.com",
    projectId: "todo-app-9f5a0",
    storageBucket: "todo-app-9f5a0.appspot.com",
    messagingSenderId: "235166947516",
    appId: "1:235166947516:web:bca35a6c27a240d4bad8b9",
    measurementId: "G-JYGLVL9X55"
  }

firebase.initializeApp(firebaseConfig) // <–– initializing firebase
export default firebase
Creating Database
Now let's create a database for our application.
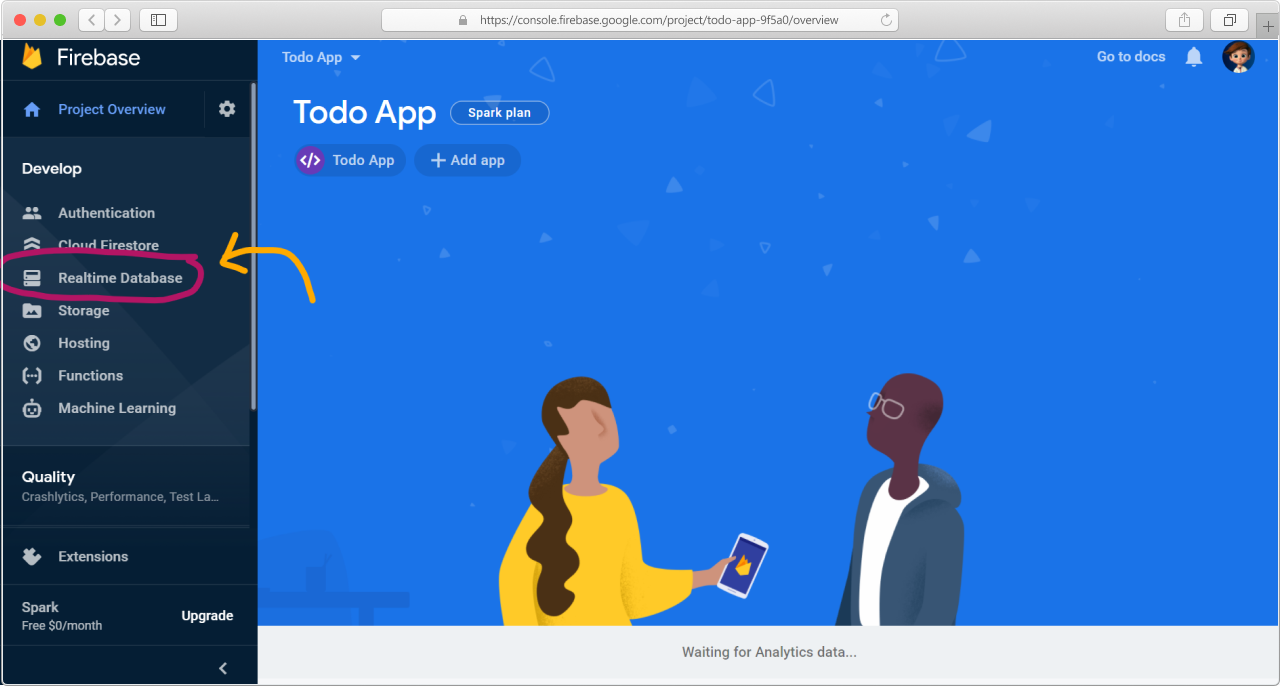
Open the Firebase project console. Click on the Realtime Database in the Develop section on the left sidebar.
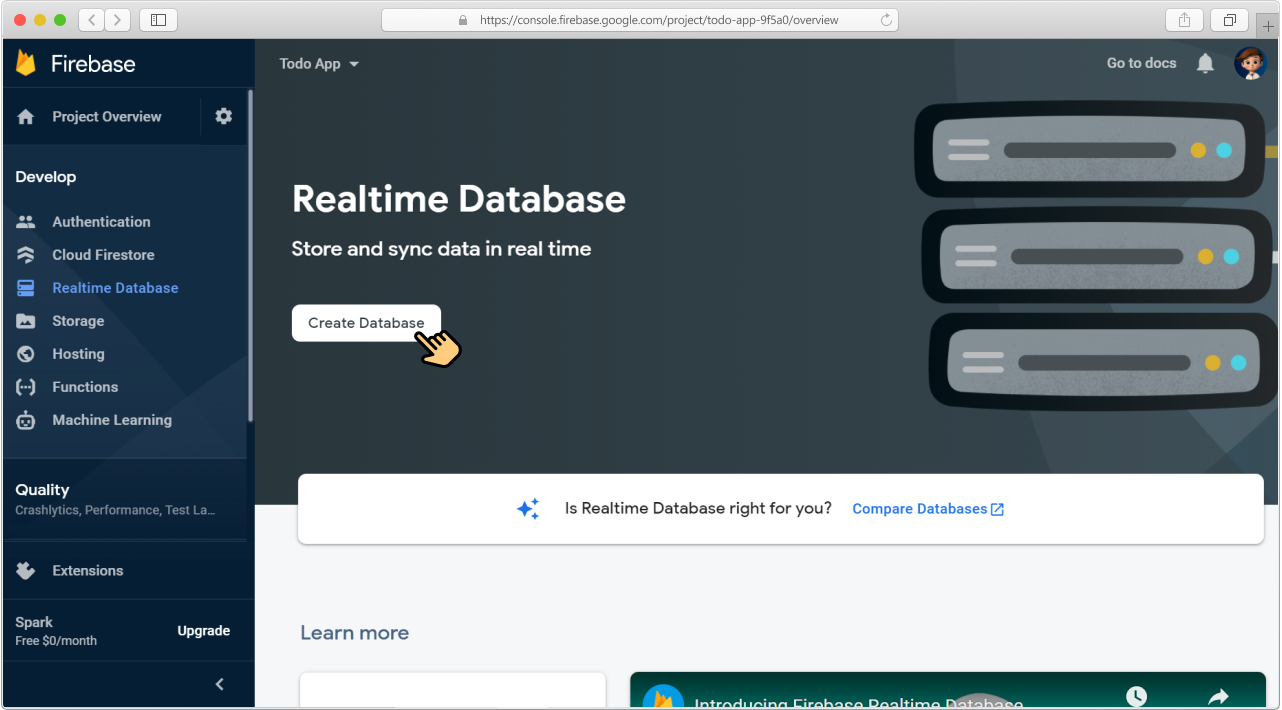
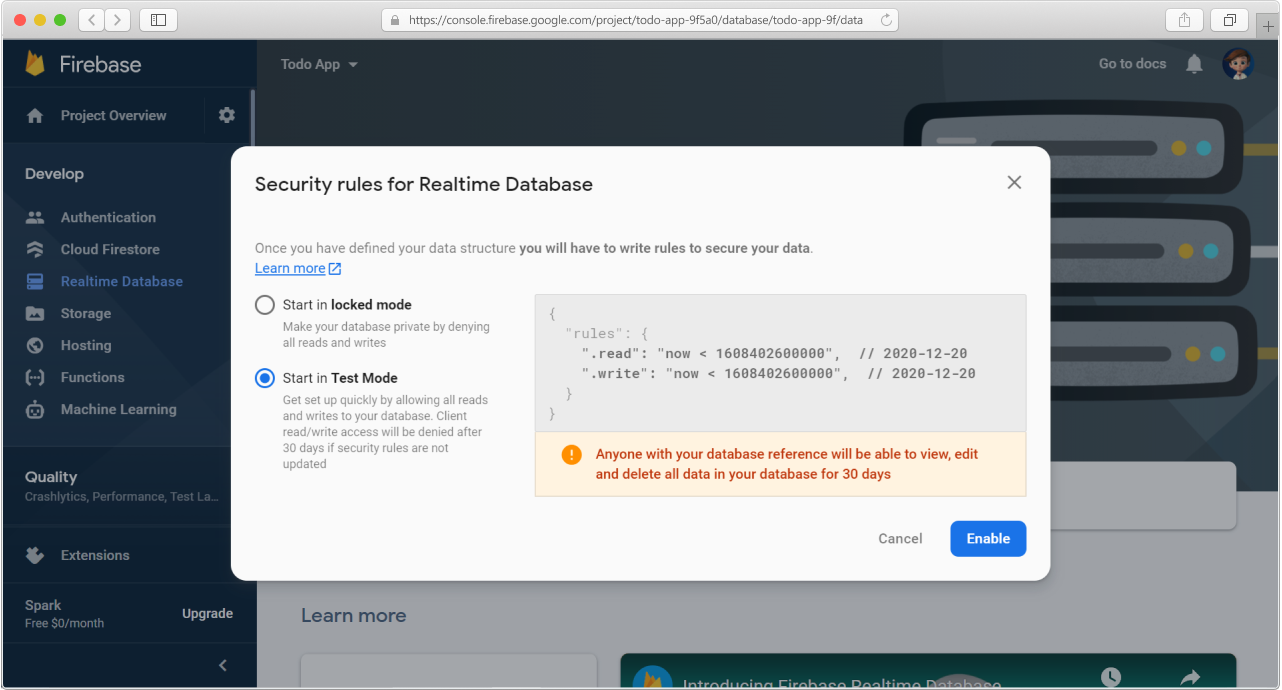
You will see something like this. :point_down: Click on the Create Database button.
Set Start in Test Mode and click on Enable.
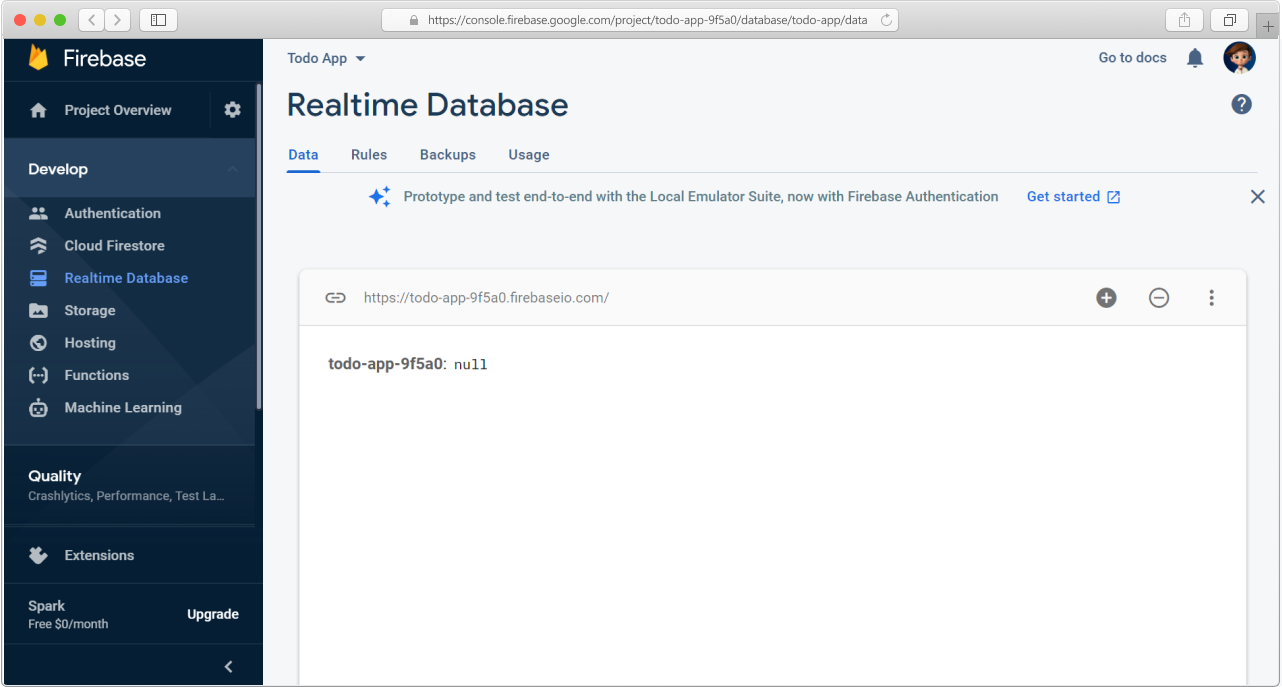
Then your Realtime Database will be created and initiated with null(nothing).
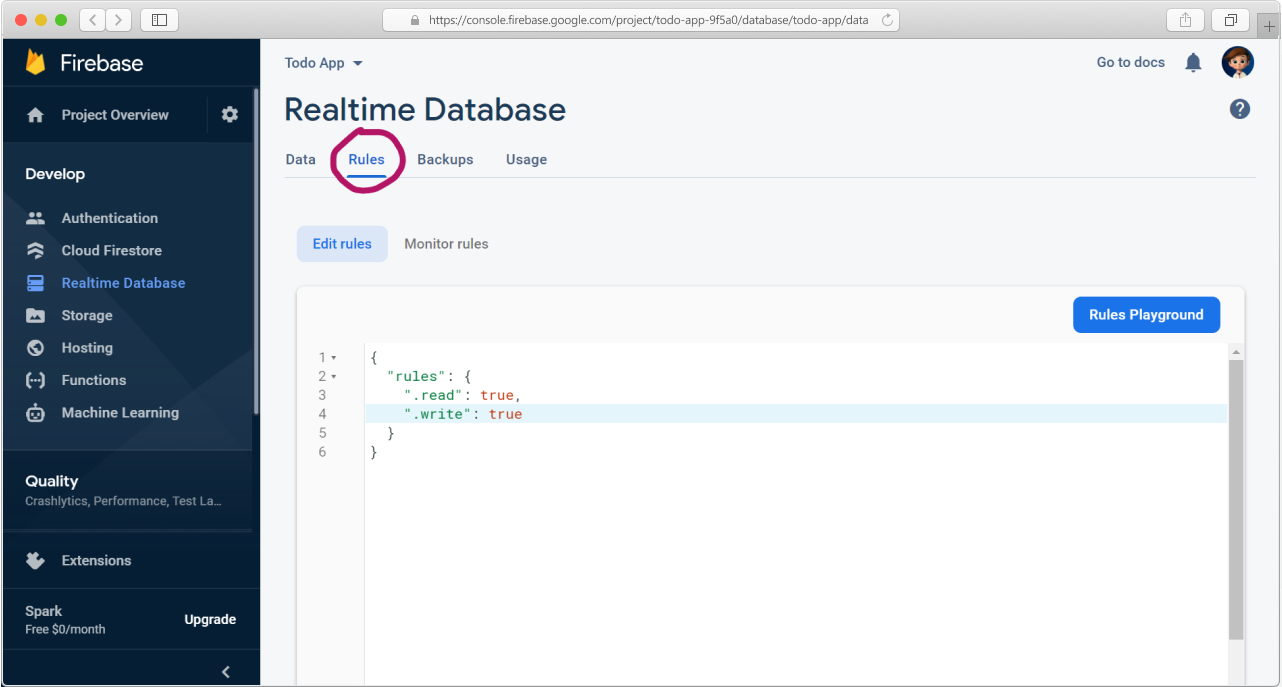
Firebase initially allows anyone to read and write the database for 30 days. You can edit the rules anytime in the Rules tab.
Now that we have a database let's create a Todo App using the database.
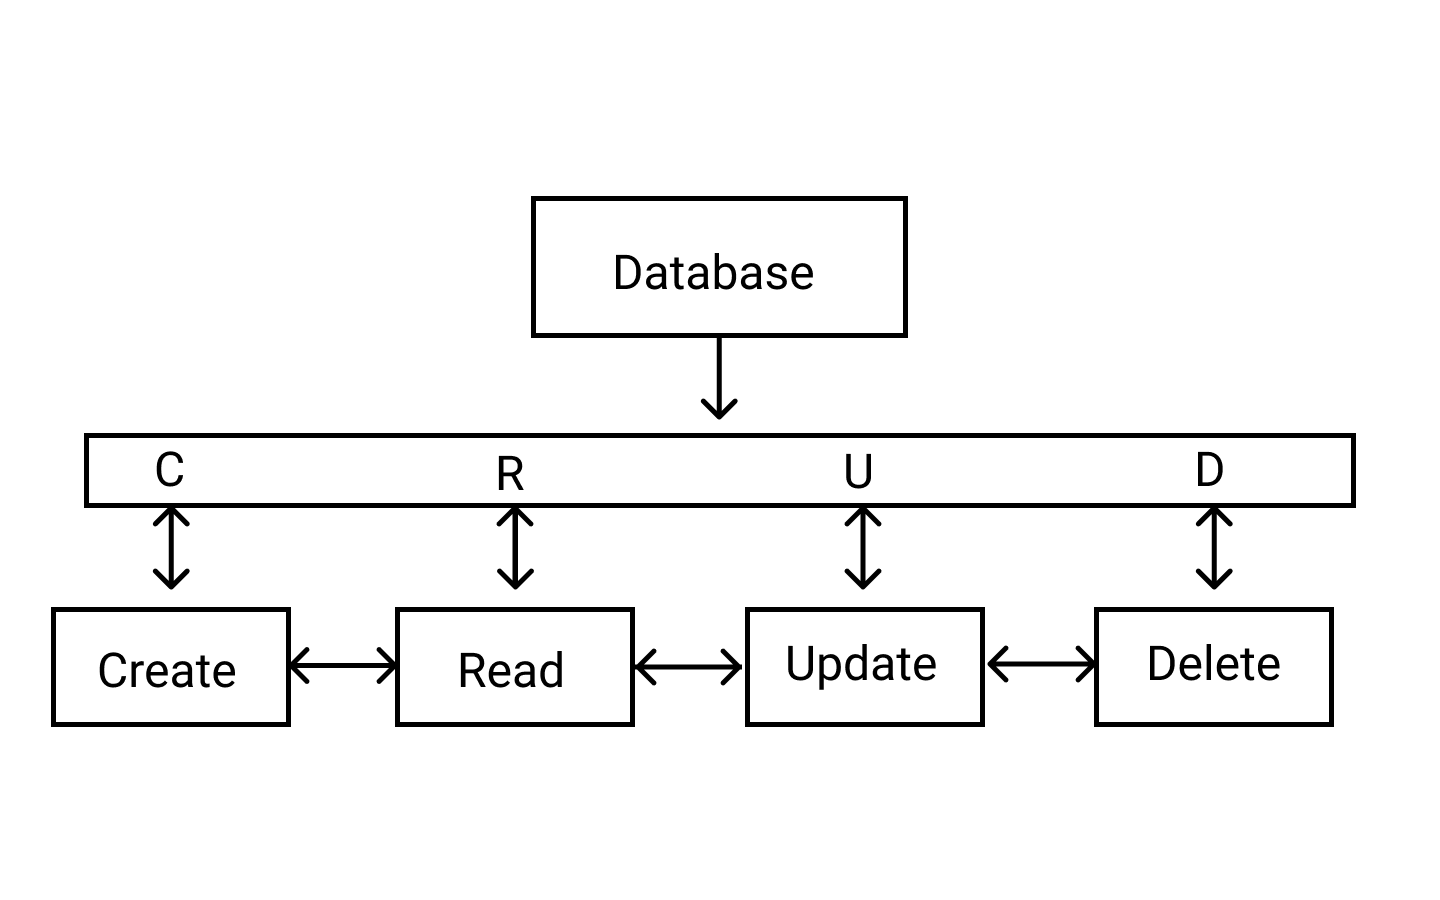
CRUD Operations
CRUD stands for Create, Read, Update, and Delete.
These are the four most basic operations that can be performed with most traditional database systems, and they are the backbone for interacting with any database.
If you want to learn more theory about CRUD, check it here
Creating Todo App
Let's create the interface of the Todo App to perform CRUD operations.
Create a new folder inside the src folder and name it as components. All of our Todo App components will be in this folder.
Inputting a Todo
Create a new file in the components folder and name it Input.js. Import React into the component, create the functional component and export it.
import React from 'react'

function Input() {
  {/* code goes here*/}
}

export default Input
Also, import the Firebase.js file you created before at the top to use Firebase inside this component.
import firebase from '../Firebase'
Create a div with a class of input inside the component.
import React from 'react'
import firebase from '../Firebase'

function Input() {
  return (
    <div className="input">
      {/* code goes here*/}
    </div>
  )
}

export default Input
Add an input and a button Add Todo with a class of add-btn inside the div element.
<div className="input">
  <input type="text" placeholder="Enter a Todo..." />
  <button className="add-btn">
  <i className="fa fa-plus-circle" aria-hidden="true"></i><span id="btn-text">Add Todo</span>
  </button>
</div>
Here, <i className="fa fa-plus-circle"> is the plus icon from Font Awesome for styling. In the starter template, Font Awesome cdn was already linked in public/index.html file.
Form elements like <input>, <select> and <textarea> in React are slightly different from those of HTML. In HTML, they responsible on their own to handle the user input and update their respective values. But in React, the forms are controlled by components using state. Learn more about React forms here.
Create a state value and update it every time the input changes using the handleChange function.
import React, { useState } from 'react' // <–– importing useState hook
import firebase from '../Firebase'

function Input() {
  const [task, setTask] = useState('') // <–– creating state variable

  function handleChange(e) {
    setTask(e.target.value) // <–– updating the state value
  }

  return (
    <div className="input">
      <input type="text" placeholder="Enter a Todo..." value={task} onChange={handleChange} />
      <button className="add-btn">
      <i className="fa fa-plus-circle" aria-hidden="true"></i><span id="btn-text">Add Todo</span>
      </button>
    </div>
  )
}

export default Input
Create operation
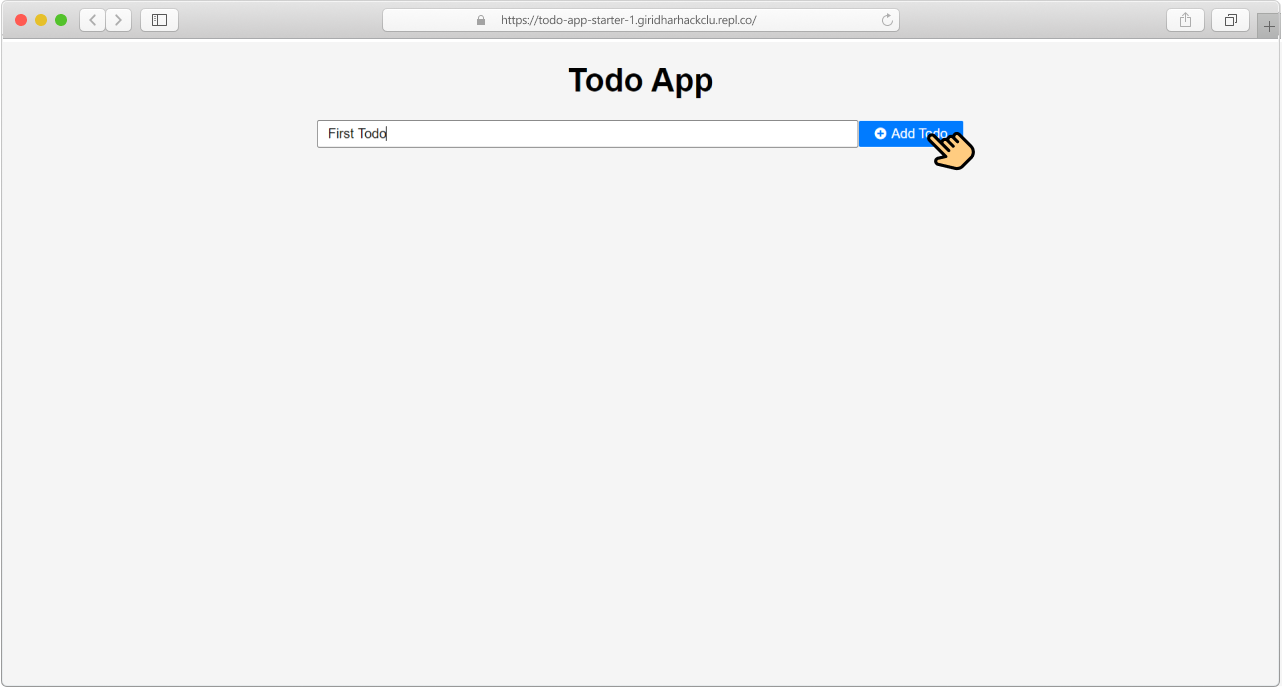
Let's add the inputted data into the database when the user clicks the Add Todo button.
Add a onClick attribute which invokes handleClick function.
<button className="add-btn" onClick={handleClick} >
  <i className="fa fa-plus-circle" aria-hidden="true"></i><span id="btn-text">Add Todo</span>
</button>
Now let's write the handleClick function.
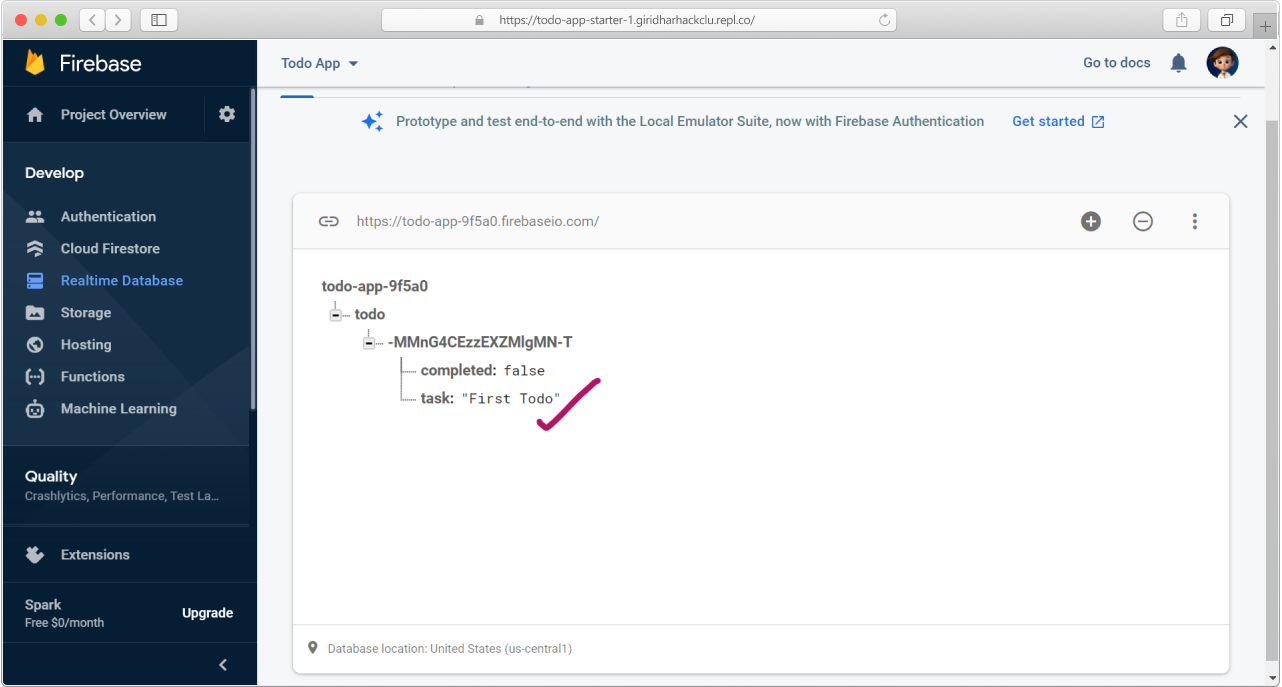
Data in Firebase is structured as collections that we can access through references.
function handleClick() {
  const todoRef = firebase.database().ref('todo') // <—— creating a reference in database
  // code goes here
 }
To add data to the database, you can use set() to save data to a specified reference, replacing any existing data at that path.
We use the push() method to append data to a list in multiuser applications. The push() method generates a unique key every time a new child is added to the specified Firebase reference.
More Info: By using these auto-generated keys for each new element in the list, several clients can add children to the same location simultaneously without writing conflicts. The unique key generated by push() is based on a timestamp, so list items are automatically ordered chronologically.
⚠ Note: Using set() overwrites data at the specified location, including any child nodes.
function handleClick() {
  const todoRef = firebase.database().ref('todo')
  const newTodoRef = todoRef.push()
  const todo = {
    task,
    completed: false
  }
  newTodoRef.set(todo)
  setTask("")
}
Here 👆, we added the data that we get as input into the database. By default, the task is incomplete. After the data is added to the database, the input field is cleared by setting task to an empty string(setTask("")).
Your final code in Input.js should look like this.
import React, { useState } from 'react'
import firebase from '../Firebase'

function Input() {
  const [task, setTask] = useState('')

  function handleChange(e) {
    setTask(e.target.value)
  }
  function handleClick() {
    const todoRef = firebase.database().ref('todo')
    const newTodoRef = todoRef.push()
    const todo = {
      task,
      completed: false
    }
    newTodoRef.set(todo)
    setTask("")
  }

  return (
    <div className="input">
      <input type="text" placeholder="Enter a Todo..." value={task} onChange={handleChange} />
      <button className="add-btn" onClick={handleClick}>
      <i className="fa fa-plus-circle" aria-hidden="true"></i><span id="btn-text">Add Todo</span>
      </button>
    </div>
  )
}

export default Input
Now import Input.js into App.js and check your output by adding some data.
import React from 'react'
import Input from './components/Input' // <—— importing Input.js
import './App.css'

function App() {
  return (
    <div className="App">
      <h1>Todo App</h1>
      <Input />
    </div>
  );
}

export default App;
Looks good, doesn't it!
The data you added through the input will be appended to our Firebase Database!
Creating Todo List
Create a new component, TodoList.js, in the components folder. Import React, Firebase, create and export a functional component.
import React, { useState, useEffect } from 'react'
import firebase from '../Firebase'

function TodoList() {
  {/*code goes here*/}
  return (
    <div className="todo-list">

    </div>
  )
}

export default TodoList
Read operation
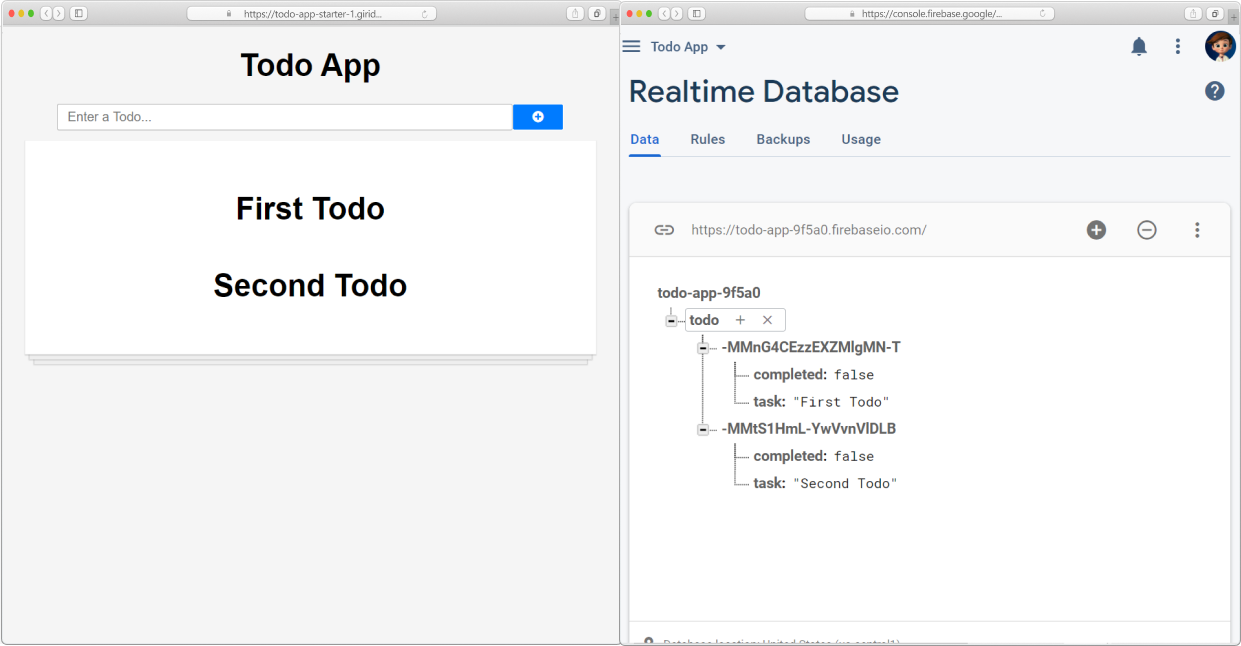
We will then read the data in the database, fetch it into an array, and display it on the screen.
Create a state variable todoList. This will be the empty array to which we add the data fetched from the database.
const [todoList, setTodoList] = useState([]) // <—— state variable
We will read the data only once after the component is rendered. To do that, we use the useEffect hook.
useEffect(() => {
  // code goes here
}, [])
We have our data stored in a specified reference(location).
To read data at a path and listen for changes, we will use the on() method of firebase.database().ref() to observe events. The on() method is used to synchronize data in real-time.
useEffect(() => {
  const todoRef = firebase.database().ref('todo')
  // Syncronizing
  todoRef.on()

}, [])
The on() method takes two parameters:
1) The event type - how you control the level of synchronization from the real-time database. 2) The callback function - the event type above controls the callback function.
Here, we are going to use the value event.
| Event | Typical usage |
|---|---|
value | Read and listen for changes to the entire contents of a path. |
The callback function is called every time there is a change at the specified location in the database. The event callback is passed a snapshot containing all data at that location, including child data. If there is no data, the snapshot will return null when you call val() on it.
todoRef.on("value", (snapshot) => {
  const todos = snapshot.val() // <—— value of the data snapshot
})
⭐ Important: The value event is called every time data is changed at the specified database reference, including changes to children. To limit the size of your snapshots, add the event listener only at the lowest level needed for watching changes. For example, adding the listener to the root of your database is not recommended.
Now we need the data as an array to put it into the state. Declare an empty array and add the id and task into the array.
todoRef.on("value", (snapshot) => {
  const todos = snapshot.val()
  const todoList = []
  for(let id in todos) {
    todoList.push({id,...todos[id]}) // <—— adding todos to todoList
  }
  setTodoList(todoList) // <—— setting the state
})
Now that we have the data in todoList, we can map through it to display it.
Initially, it is an empty array. So we have to check whether it is empty or not, then map through it.
For now, let's display our list using the <h1> tag but later, we will create a separate component for rendering it.
return (
  <div className="todo-list">
    {todoList ? todoList.map((todo) => <h1> {todo.task} </h1>) : null}
  </div>
)
Your TodoList component's code so far:
import React, { useState, useEffect } from 'react'
import firebase from '../Firebase'

function TodoList() {
  const [todoList, setTodoList] = useState([])

  useEffect(() => {
    const todoRef = firebase.database().ref('todo')
    // Syncronizing
    todoRef.on("value", (snapshot) => {
      const todos = snapshot.val()
      const todoList = []
      for(let id in todos) {
        todoList.push({id,...todos[id]})
      }
      setTodoList(todoList)
    })

  }, [])

  return (
    <div className="todo-list">
      {todoList ? todoList.map((todo) => <h1> {todo.task}</h1>) : null}
    </div>
  )
}

export default TodoList
This will display the data that is retrieved from the database. Make sure you import and render the TodoList component into App.js.
So far, we have done Create and Read operations. Halfway done!!! 🙌

Let's continue to work with Update and Delete operations.
Creating Todo Item
Create another file, Todo.js, in the components folder. Import React and Firebase. Also, create a functional component that takes a prop todo.
import React from 'react'
import firebase from '../Firebase'

function Todo({ todo }) {
  return (
    <div classsName="todo-item">

    </div>
  )
}

export default Todo
Update the TodoList by importing Todo and rendering it.
return (
  <div className="todo-list">
    {todoList ? todoList.map((todo, i) => <Todo todo={ todo } key={ i } />) : null}
  </div>
)
Here, 👆 we are rendering a Todo component for each todo and also passing the data to that component as prop, using map() method. Learn more about map() here. If you want to know more about rendering multiple components, check this.
Your final TodoList component looks like this:
import React, { useState, useEffect } from 'react'
import firebase from '../Firebase'
import Todo from './Todo'

function TodoList() {
  const [todoList, setTodoList] = useState([])

  useEffect(() => {
    const todoRef = firebase.database().ref('todo')
    // Syncronizing data
    todoRef.on("value", (snapshot) => {
      const todos = snapshot.val()
      const todoList = []
      for(let id in todos) {
        todoList.push({id,...todos[id]})
      }

      setTodoList(todoList)
    })

  }, [])

  return (
    <div className="todo-list">
      {todoList ? todoList.map((todo, i) => <Todo todo={ todo } key={ i } />) : null}    {/* <—— updated with
      <Todo />*/}
    </div>
  )
}

export default TodoList
Hop on to the Todo component, and let's display the data.
function Todo({ todo }) {
  return (
    <div className="todo-item">
      <div className="task">
        <input type="checkbox" />
        <p>{todo.task}</p>
      </div>
      <div className="buttons">
        <button className="del-btn"><i className="fa fa-trash" aria-hidden="true"></i></button>
      </div>
    </div>
  )
}
This displays the todo items with a checkbox and delete button.
Let's add functionality to the buttons.
Update operation
When the checkbox is checked, the task is completed. Let's update the value of completed to true.
Add the onClick attribute to the checkbox that invokes completeTodo function. Whether the checkbox is checked or not depends on the completed value.
<input type="checkbox" onClick={ completeTodo } checked={ todo.completed }/>
To simultaneously write to specific children of a node without overwriting other child nodes, we can use the update() method. When we call update(), it updates lower-level child values by specifying a path for the key.
function completeTodo() {
  const todoRef = firebase.database().ref('todo')
  todoRef.child(todo.id).update({ // <—— updates the object with the key of todo.id
    completed: !todo.completed
  })
}
The above code updates the completed in the database.
Click on Run and check whether it's working.
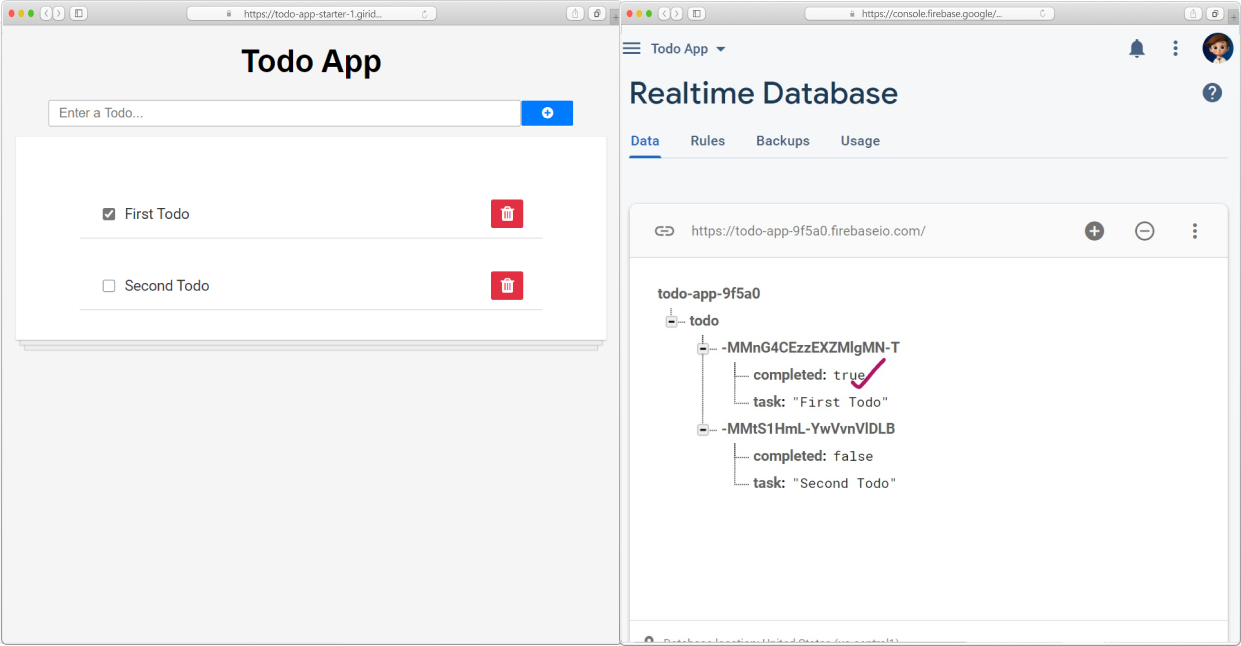
Also, let's add styling for the completed tasks before our completeTodo() function.
const completedStyle = { // <—— styles for completed task
    fontStyle: "italic",
    opacity: 0.4,
    textDecoration: "line-through"
}
And apply that style to the paragraph containing our task.
<p style={todo.completed ? completedStyle : null} >{todo.task}</p>
Our code so far:
import React from 'react'
import firebase from '../Firebase'

export default function Todo({ todo }) {
  const completedStyle = { // <—— styles for completed task
    fontStyle: "italic",
    opacity: 0.4,
    textDecoration: "line-through"
   }

  function completeTodo() {
    const todoRef = firebase.database().ref('todo')
    todoRef.child(todo.id).update({
      completed: !todo.completed
    })
  }
  return (
    <div className="todo-item">
      <div className="task">
        <input type="checkbox" onClick={ completeTodo }checked={todo.completed}/>
        <p style={todo.completed ? completedStyle : null} >{todo.task}</p> {/* <—— adding className depending on todo.completed */}
      </div>
      <div className="buttons">
        <button className="del-btn"><i className="fa fa-trash" aria-hidden="true"></i></button>
      </div>
    </div>
  )
}
Now our completed tasks will be styled accordingly.
Let's add functionality to our delete button.
Delete operation
Add onClick attribute to the button with a deleteTodo function.
<button className="del-btn" onClick={ deleteTodo }>
  <i className="fa fa-trash" aria-hidden="true"></i>
</button>
The simplest way to delete data is to call remove() on a reference to that data location.
function deleteTodo() {
  const todoRef = firebase.database().ref('todo')
  todoRef.child(todo.id).remove()
}
Our final Todo component will be something like this:
import React from 'react'
import firebase from '../Firebase'

function Todo({ todo }) {
  const completedStyle = {
    fontStyle: "italic",
    opacity: 0.4,
    textDecoration: "line-through"
  }

  function completeTodo() {
    const todoRef = firebase.database().ref('todo')
    todoRef.child(todo.id).update({
      completed: !todo.completed
    })
  }
  function deleteTodo() {
    const todoRef = firebase.database().ref('todo')
    todoRef.child(todo.id).remove()
  }

  return (
    <div className="todo-item">
      <div className="task">
        <input type="checkbox" onClick={ completeTodo }checked={todo.completed}/>
        <p style={todo.completed ? completedStyle:null} >{todo.task}</p>
      </div>
      <div className="buttons">
        <button className="del-btn" onClick={ deleteTodo }><i className="fa fa-trash" aria-hidden="true"></i></button>
      </div>
    </div>
  )
}

export default Todo

That's it, folks! We completed our Full-stack Todo App. Check your final code here. ✌

Hacking
Now it's your turn to customize.
- Go wild with the styles. Create your custom Todo Apps.
- Add more functionality. Eg:- chance to edit the added todo, alert before deleting any todo, etc.
- Filter the tasks as completed and due.
I recommend customizing this project as much as you can! Share your creation with everyone in the #ship channel on the Hack Club slack. Don't forget to share it with me too!!! I'm @Giridhar on slack. I'd love to hear from you.
Inspiration
These are some examples to inspire your thoughts.
-
Example-1: A Todo App where you can edit the added task, using Material UI for styling components.
-
Example-2: Contact Form using React and Firebase.
-
Example-3: Phonebook app (more inputs for database)