

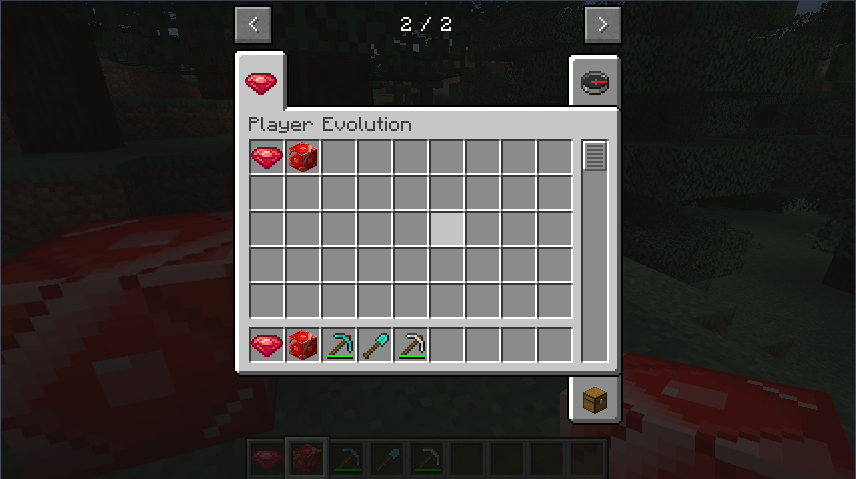
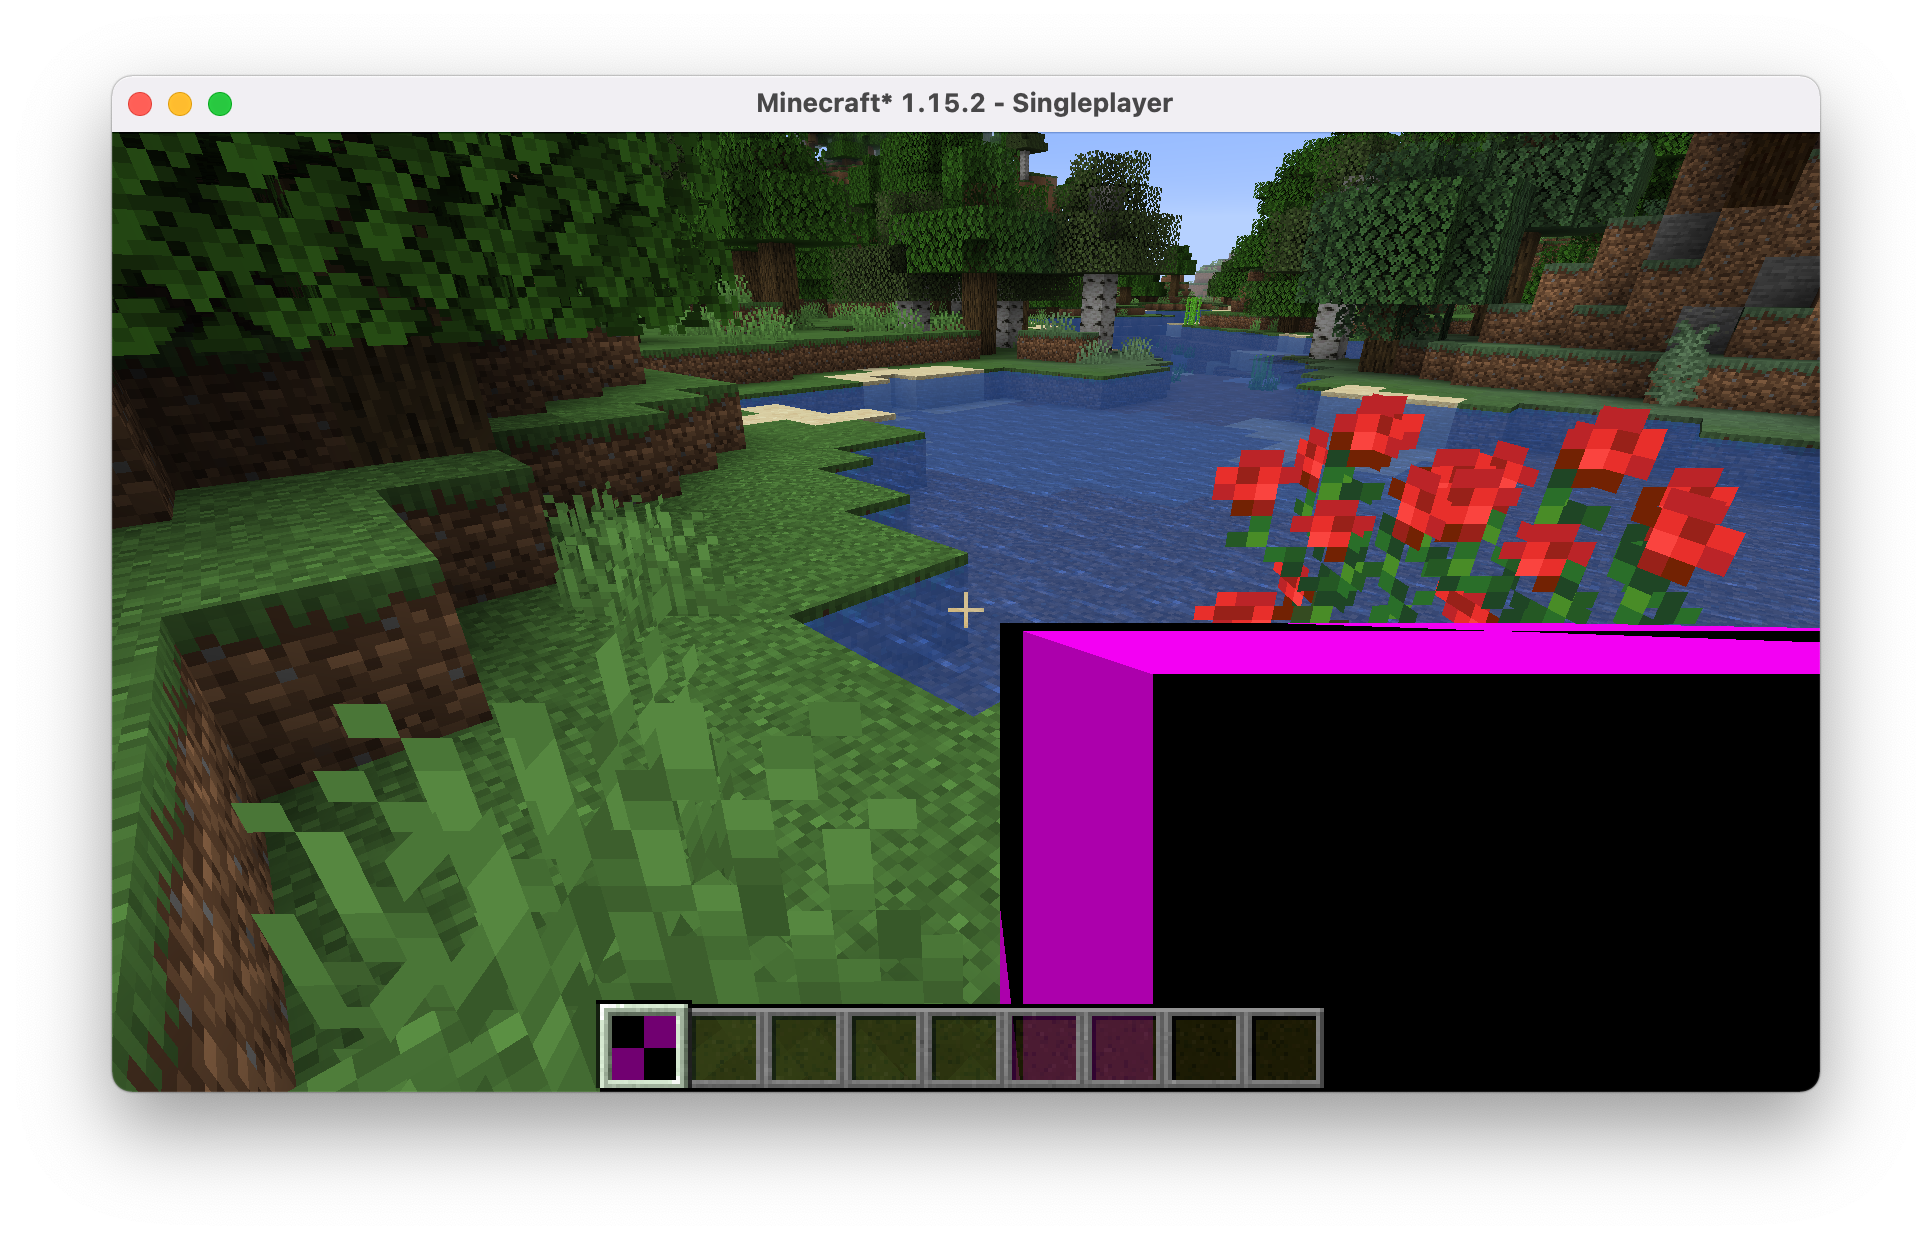
Learning to mod Minecraft is a very simple process and can help anyone learn programming. Minecraft uses the Java language which albeit old, is still very popular and learning it is still useful. This Minecraft modding workshop will go from setting up IntelliJ IDEA to making an item, creative inventory tab, and a block. The result will look something like this:
Here is the final code. This workshop should take about an hour and a half to complete.
Note: unlike most workshops, this workshop requires a local development environment. You need to use a computer that you're allowed to install things on. If you're using a school-issued computer or a Chromebook, this workshop may not work for you.
For the sake of simplicity, this workshop will assume you're using IntelliJ to code your project.
Part 1: Setup
The annoying thing about Minecraft development is that it requires a lot of setup. In the interest of keeping this workshop short and focused on mod building, we're going to skip a lot of the setup and start from a starter project. Don't worry, though—I'll still explain what's happening in the setup process and why every part of it is necessary, so you'll still be able to make your own Minecraft mods on your own after this workshop.
First, make sure you have IntelliJ IDEA installed. If you don't, download it here first (the community edition is fine).
Next, download and unzip the starter project from hack.af/modworkshopstarter. Once it's downloaded, open IntelliJ. Click on Open or Import, find the unzipped starter project and open it.
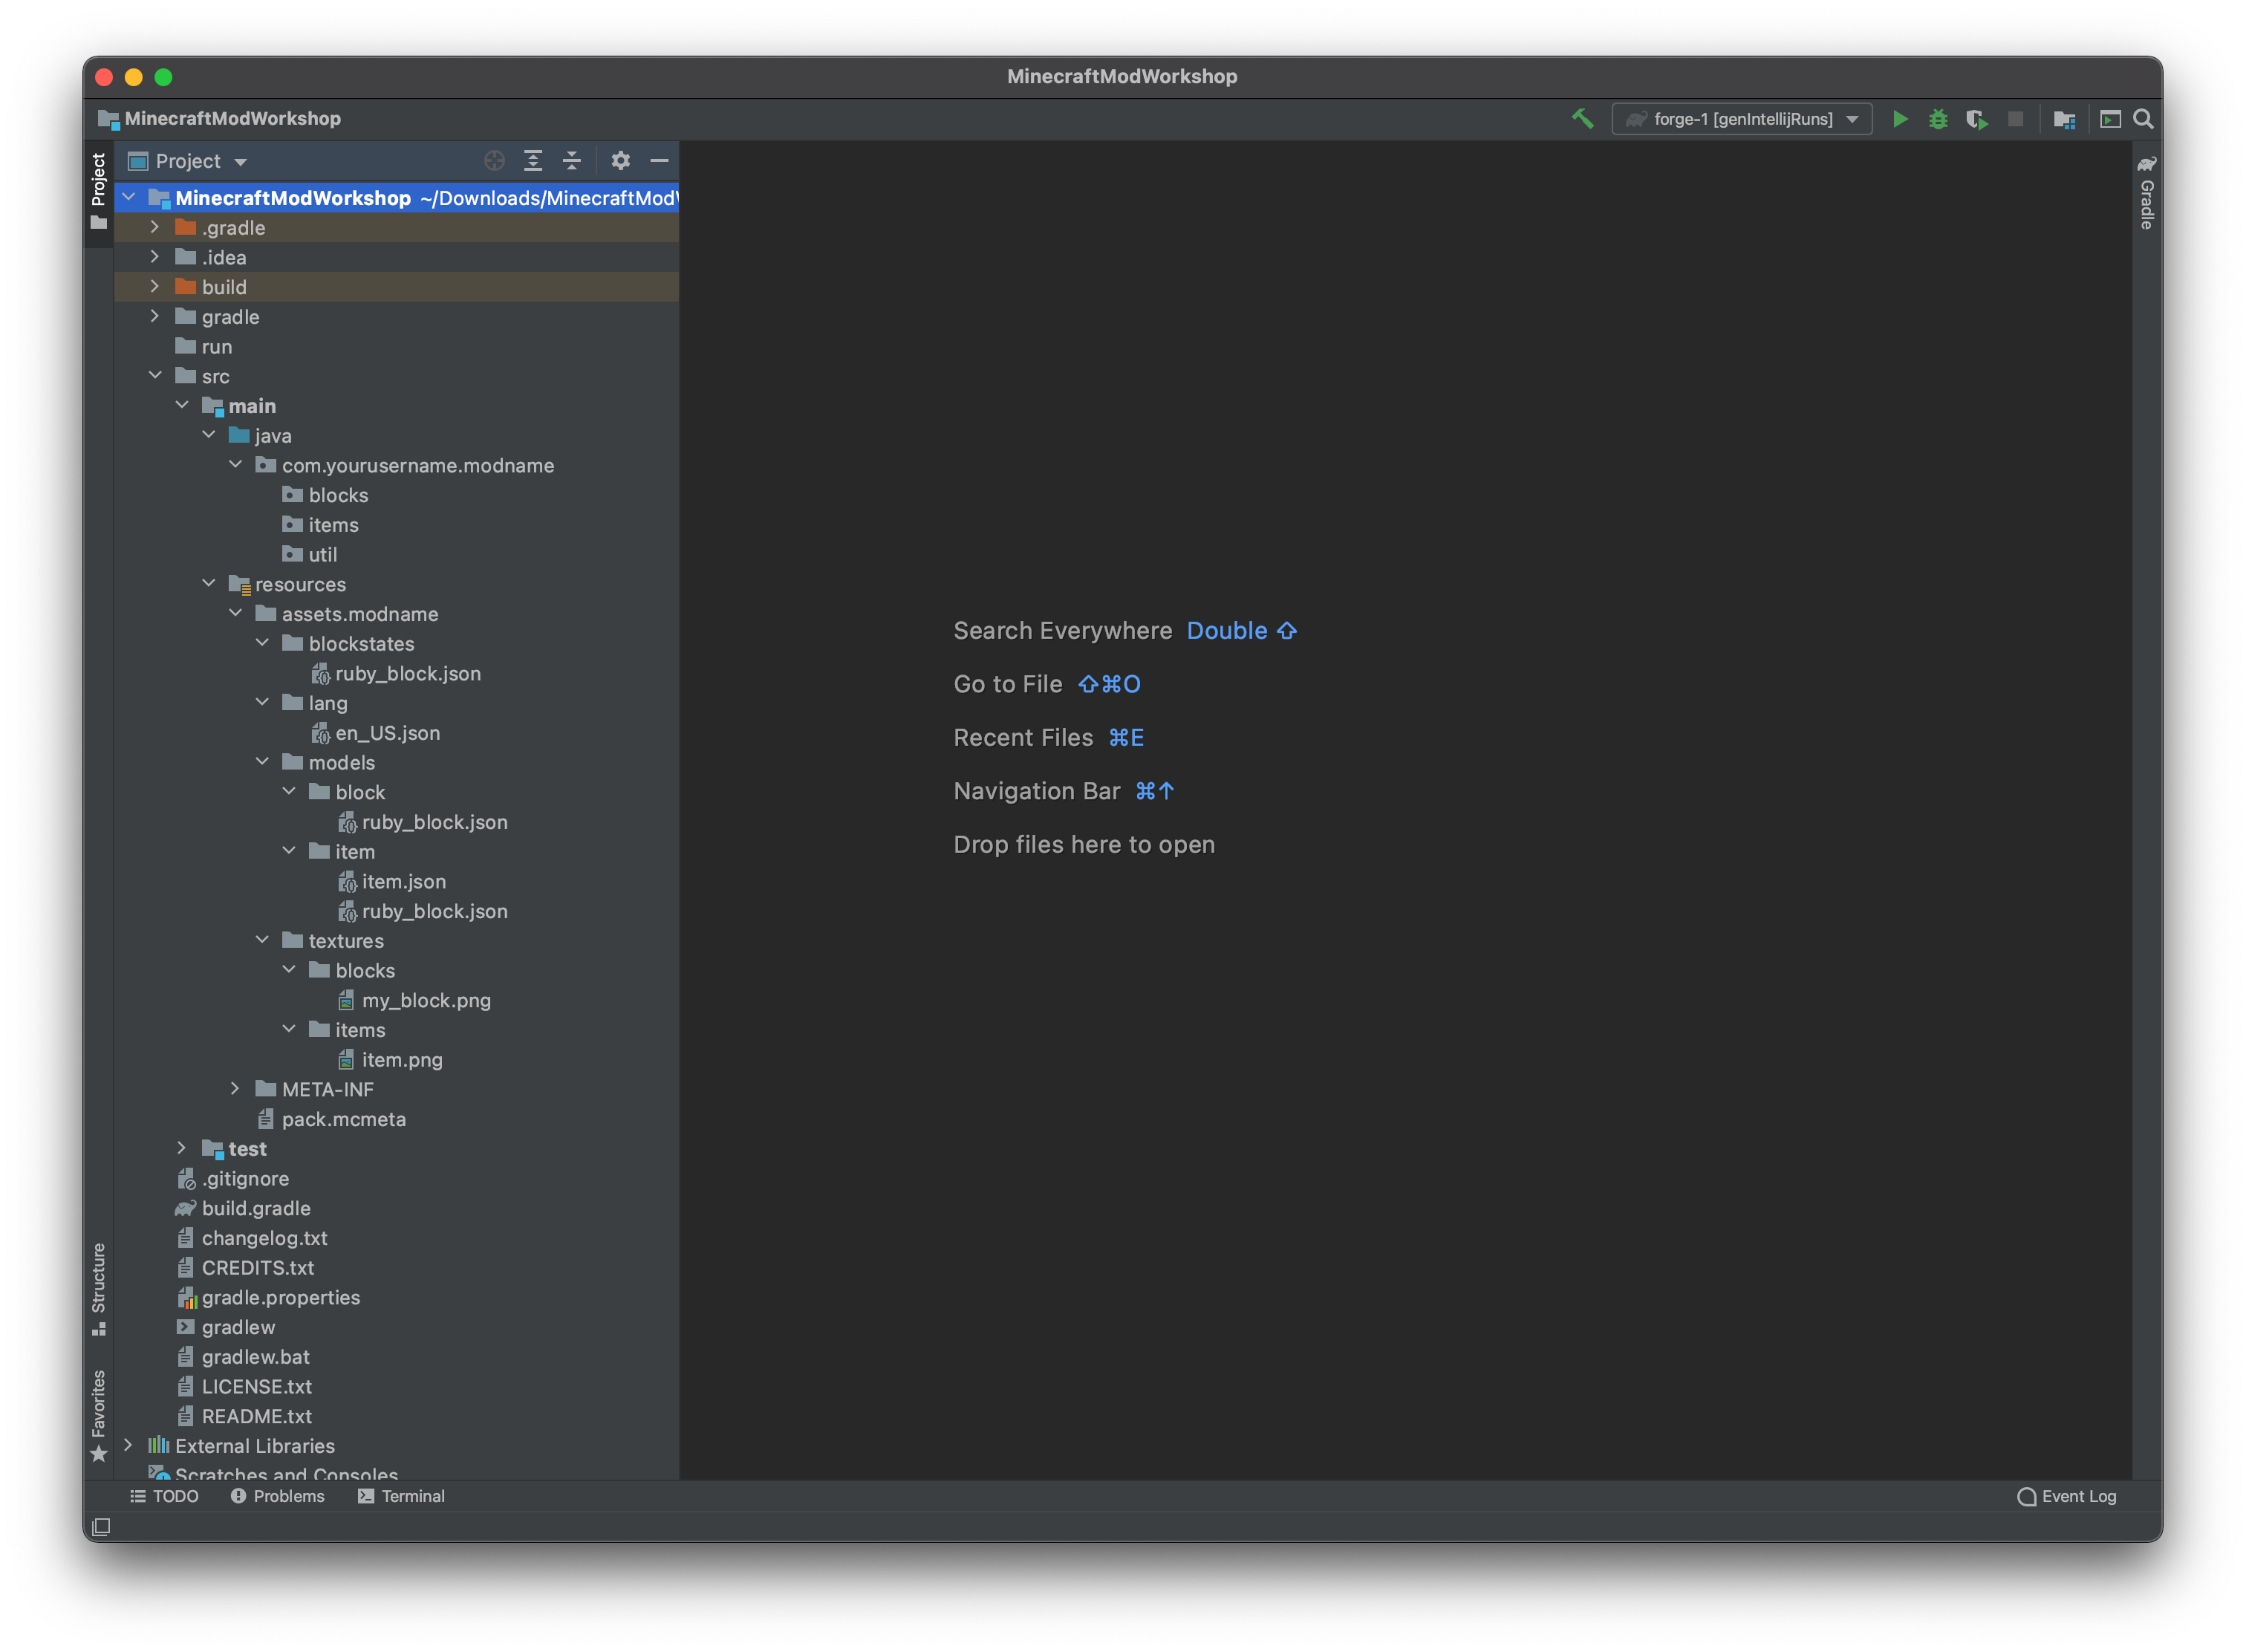
You should be greeted with something like this:
Walking through the starter project
So what's all this stuff?
The most important thing that's included in this project is Forge. Forge is the API used to make Minecraft mods. Throughout the process of making this mod, you'll be importing things from "net.minecraft" or "net.minecraftforge"—these are all methods as part of Forge that allow you to access things in Minecraft, such as blocks, items, inventory, textures, events, you name it!
How do you install Forge normally (not as part of a starter project)?
If you're going to make mods in the future, you'll have to be able to install Forge yourself. Here's how you do it:
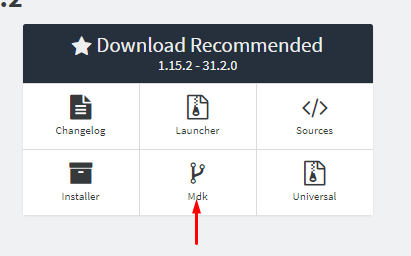
Download the Forge MDK for 1.15.2. There will be a few download links—make sure you click on the one that says "Mdk".
When you click on "Mdk", you will be taken to a very sketchy-looking page with a bunch of ads. Your computer will be fine, but DO NOT click on anything on the page! Wait 5 seconds, then a button that says "Skip" will appear at the top right. Click the "Skip" button to download the Forge MDK. Sadly, navigating spam and adware is normal in the Minecraft world. It's not a big deal, but it's something you should be aware of and navigate through carefully if you choose to continue mod or plugin development.
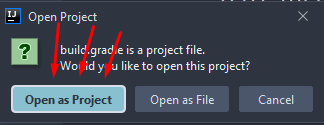
Once the Forge MDK is installed, start up IDEA. Once it's started up, click on Open or Import. Find the Forge MDK folder (usually called forge or forge-1) and select the file inside it called build.gradle. When prompted, choose Open as Project.
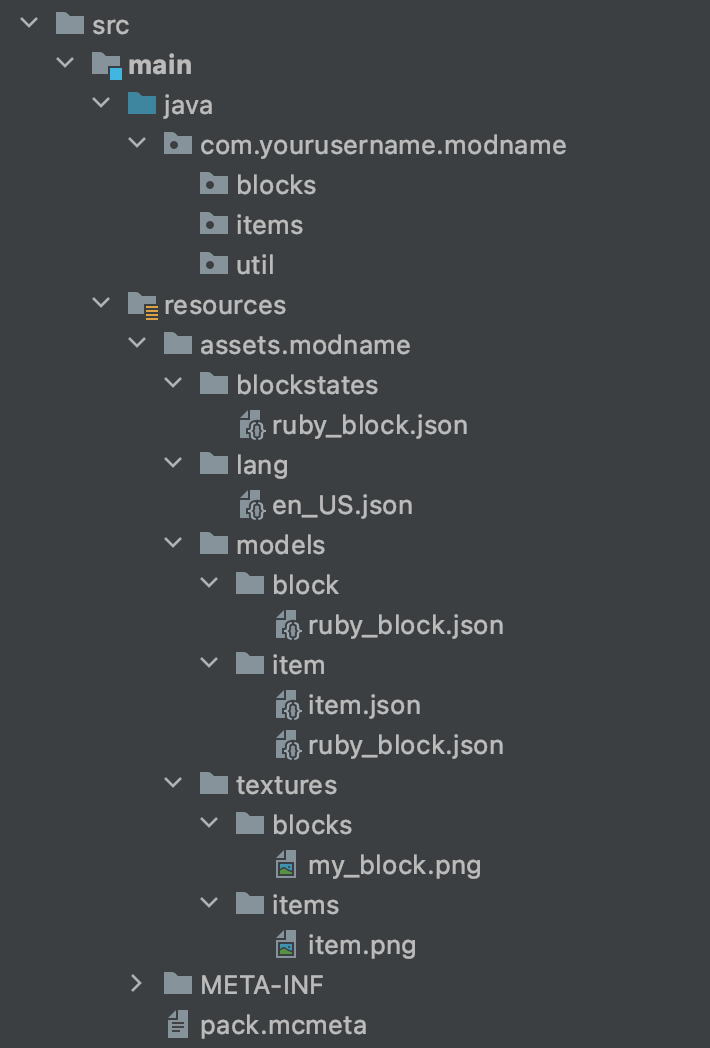
Next, if you expand all the folders in under the main folder on the left sidebar, you'll notice a bunch of nested folders with some files inside them. This is the common folder structure for a Minecraft mod. If you make your own mod in the future, you'll have to make all of these folders and files yourself.
The setup steps that we do need to do
We do need to do two small setup things before we can begin coding our mod.
First:
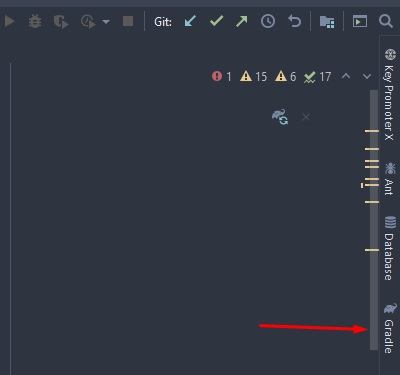
- Click on the tab called
Gradleat the top right corner. This will look like a super thin tab, and theGradlelabel will be 90 degrees sideways. You will see a section pop out of the right of IntelliJ.
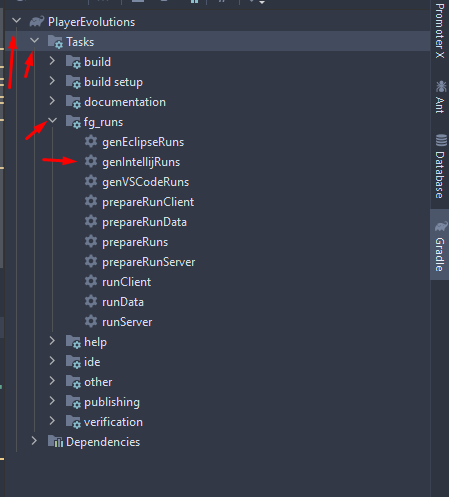
- Open the folder called
Tasks - Open the folder called
fg_runs - Double-click on
genIntelliJRuns
This may take a while.
Gradle is the name of the build system we are using. It is what turns our Java code into something the compiler understands. Tasks is a directory of all the build actions we can use, so if we wanted to change the way the compiler saw our program then we change which build action or Task. fg_runs is the Forge specfic build action set and contains all the build actions for our program.
genIntellijRuns tells the compiler and the program itself that it needs to go through Forge before going through the compiler. This also sets us up with our development environment with the mod automically loaded in and a test version of Minecraft is loaded when you run the program from your IDE.
Once it has been built, it should say BUILD SUCCESSFUL in the Build tab at the bottom. You can close the gradle tab now by clicking on the - at the top right.
Next, we need to rename some of the directories in the project. Take a look at your left sidebar. See how these are two directories that say yourusername and modname?
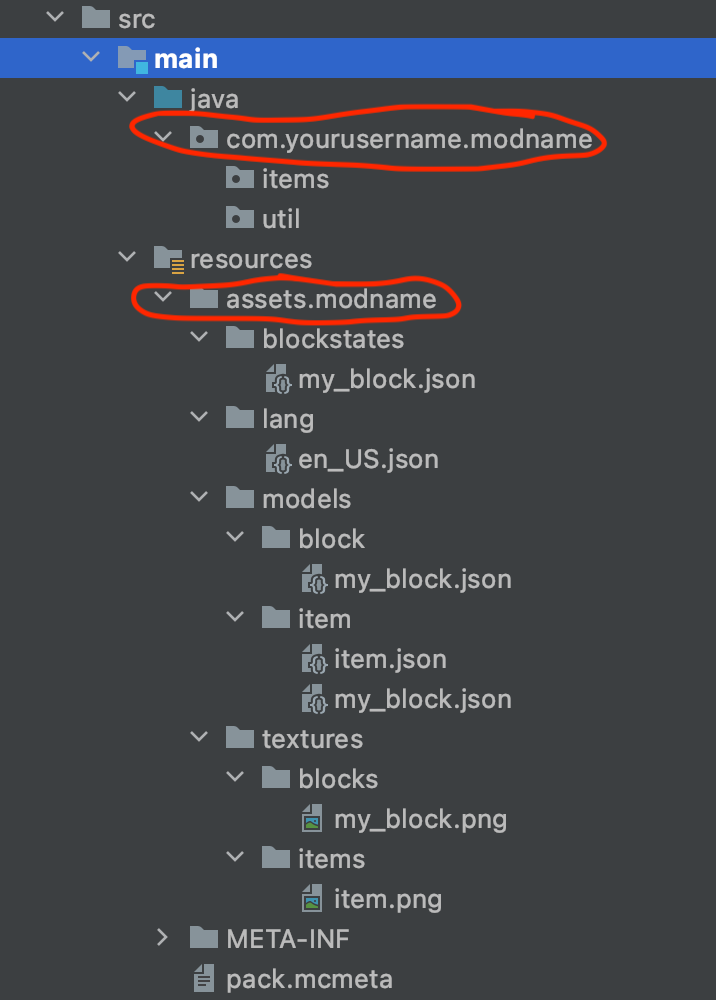
The one at the top is called a package. Minecraft mods and plugins follow this package structure. Packages follow the format com.yourusername.modname. In IntelliJ, they're separated by periods, but these periods are actually their own nested directories.
- Right-click on the package at the top. Hover over
Refactor, then clickRename. Replaceyourusernamewith your username (if you don't know what to put here, just put your name), andmodnamewithplayerevolutions. Make sure there are no spaces and everything is lowercase. - Next, right-click on the
assets.modnamedirectory. Hover overRefactor, then clickRename. Replacemodnamewithplayerevolutions.
If you see a package called "yourusername" under your newly-renamed package, feel free to delete it.
Now we're ready to start coding! 🚀
Creating your first class
Right-click on the package near the top. Hover over New, then click Java Class. We want this class to be called the same as our mod name. Since our mod name is playerevolutions, name this class PlayerEvolutions (make sure the P and E are capitalized)
A class in Java is a blueprint that allows you to create new objects. For more information about classes read here
IntelliJ should automatically open the Java class. If it doesn't, open it by double-clicking it.
Just above the public class PlayerEvolutions line, add:
@Mod("playerevolutions")
public class PlayerEvolutions {

}
As you type @Mod, IntelliJ will prompt you to import something from Forge. Hit enter to import it. In Java, this @ thing is what's known as an interface. Forge provides an interface for registering our mod. By putting "playerevolutions" inside the parenthesis, we're specifying that that is our mod ID.
Once this happens, here's what your Java file should look like:
package com.yourusername.playerevolutions;

import net.minecraftforge.fml.common.Mod;

@Mod("playerevolutions")
public class PlayerEvolutions {

}
Inside the class (in between the curly braces), add:
@Mod("playerevolutions")
public class PlayerEvolutions {
  private static final Logger LOGGER = LogManager.getLogger();
  public static final String MOD_ID = "playerevolutions";
}
Move your cursor onto Logger and LogManager, then type Alt + Enter on your keyboard to import the packages. Once you do this, two import statements should be added to the top of the file.
Make sure these are the import statements:
import org.apache.logging.log4j.LogManager;
import org.apache.logging.log4j.Logger;
If the import statements are these:
import java.util.logging.Logger;
import java.util.logging.LogManager;
❌ that is incorrect. Delete those lines and replace them with the two that include org.apache.
A Logger is just a method that makes it easy to log things to the console. You don't really need to know the specifics of what it does if you don't already know what it is.
Under the line you just wrote (the one that contains MOD_ID), add a constructor, like so:
public PlayerEvolutions() {

}
Inside the constructor, add:
public PlayerEvolutions() {
  FMLJavaModLoadingContext.get().getModEventBus().addListener(this::setup);
  FMLJavaModLoadingContext.get().getModEventBus().addListener(this::doClientStuff);
  MinecraftForge.EVENT_BUS.register(this);
}
Hit Alt + Enter to import FMLJavaModLoadingContext and MinecraftForge. For now, you'll see errors on setup and doClientStuff. This is because we're referencing some methods that we haven't written yet. Once we write those methods, those errors will go away.
So let's define those methods! After the constructor, add:
public PlayerEvolutions {
  // ...code we just wrote
}

private void setup (final FMLCommonSetupEvent event) {

}
private void doClientStuff(final FMLClientSetupEvent event) {

}
Make sure to import FMLCommonSetupEvent and FMLClientSetupEvent.
What we just made is a very stripped-down version of the example file mod that Forge gives us. Since all we need to do in this workshop is make an item and a block, that is all the Java we need for the mod to load within Minecraft.
Here's what your class should look like so far:
package com.yourname.playerevolutions;

import net.minecraftforge.common.MinecraftForge;
import net.minecraftforge.fml.common.Mod;
import net.minecraftforge.fml.event.lifecycle.FMLClientSetupEvent;
import net.minecraftforge.fml.event.lifecycle.FMLCommonSetupEvent;
import net.minecraftforge.fml.javafmlmod.FMLJavaModLoadingContext;
import org.apache.logging.log4j.LogManager;
import org.apache.logging.log4j.Logger;

@Mod("playerevolutions")
public class PlayerEvolutions {
    private static final Logger LOGGER = LogManager.getLogger();
    public static final String MOD_ID = "playerevolutions";

    public PlayerEvolutions() {
        FMLJavaModLoadingContext.get().getModEventBus().addListener(this::setup);
        FMLJavaModLoadingContext.get().getModEventBus().addListener(this::doClientStuff);
        MinecraftForge.EVENT_BUS.register(this);
    }

    private void setup (final FMLCommonSetupEvent event) {

    }
    private void doClientStuff(final FMLClientSetupEvent event) {

    }
}
Next, we need to edit some metadata. Go to your src/main/resources/META-INF/ directory and open the mods.toml file. This file contains the metadata for your mod. You won't need to edit most of the file, but you do need to edit one thing.
Find the line that starts with modId. Replace ModWorkshop with playerevolutions. This is case-sensitive, so make sure it looks exactly the same!
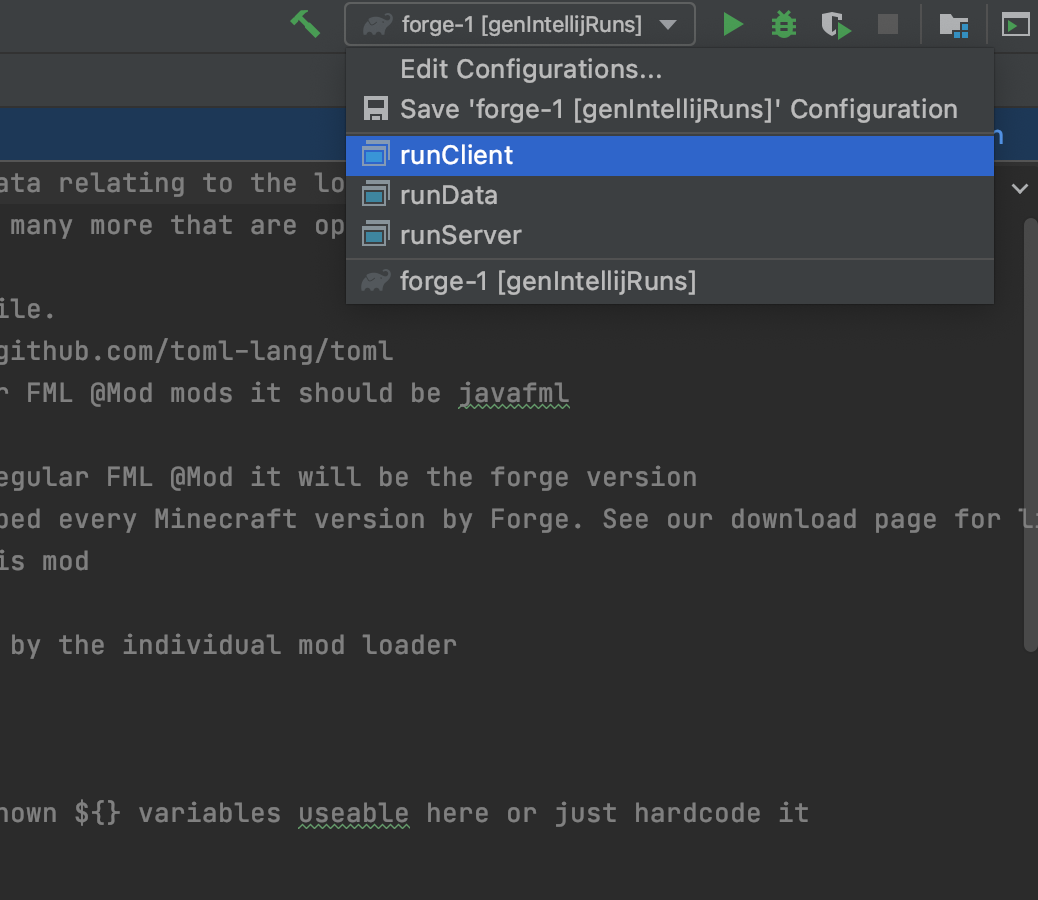
In order to build and run Minecraft to test the mod, click on the build menu at the top and choose runClient. Then press Shift-F10 or the triangle play button. This may take a little while.
Part 2: Setting up the Registry!
We're almost ready to start writing our first item. But first, we need to make a Registry Handler.
A Registry Handler is what Forge describes as making objects known to the game. We are telling Minecraft that there are new elements like blocks, items, sounds, resources and we need to load them in. Without this, Minecraft would not know what to load or how to load in the new resources.
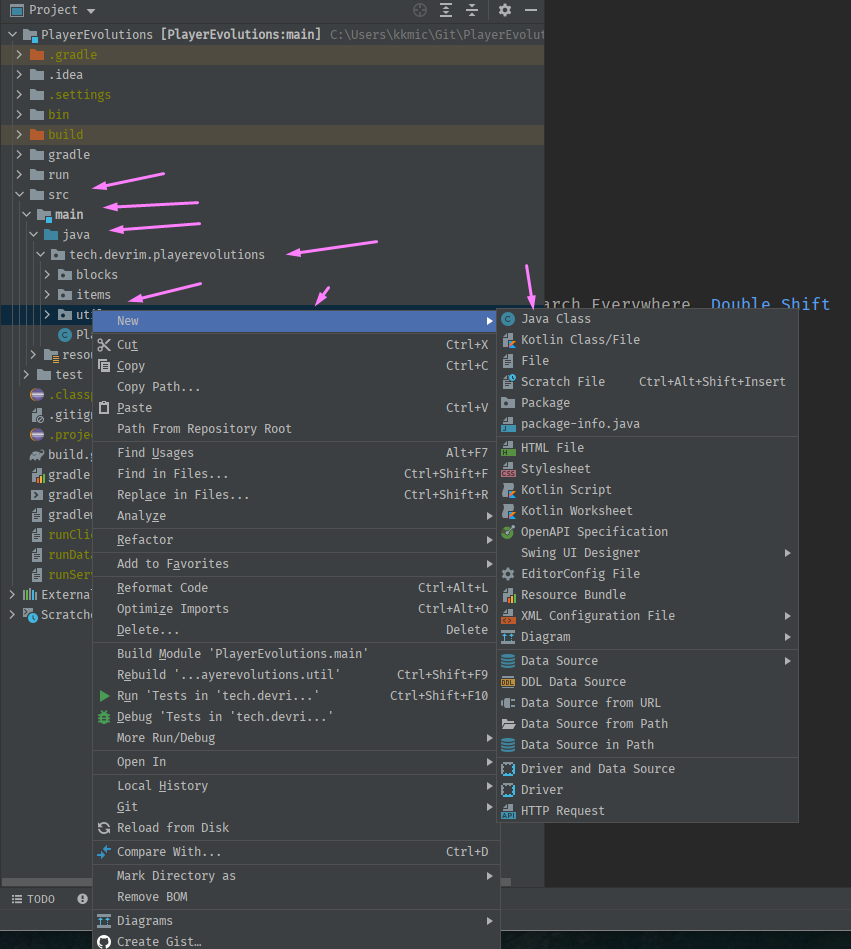
To create one, find the package called util in src/main/java/com/name/modname/. Right-click on it and create a new class called RegistryHandler.
Inside the RegistryHandler class, add:
public class RegistryHandler {
  public static final DeferredRegister<Item> ITEMS = new DeferredRegister<>(ForgeRegistries.ITEMS, PlayerEvolutions.MOD_ID);
}
Import any statements that aren't imported. Notice that you're importing the PlayerEvolutions class you just wrote near the end!
The <> syntax in this code also means that it is a generic type in Java and can be as of Type. Since we are not changing the type in this Registry Handler class we can keep it as the default type, <>.
Next, create a method called init() to initialize the creation of our items. Under the line you just added, add:
public class RegistryHandler {
  public static final DeferredRegister<Item> ITEMS = new DeferredRegister<>(ForgeRegistries.ITEMS, PlayerEvolutions.MOD_ID);

  public static void init() {
    ITEMS.register(FMLJavaModLoadingContext.get().getModEventBus());
  }
}
(Make sure to import FMLJavaModLoadingContext)
Essentially, we are just adding our item to the Forge registry.
To finish off registering our items, go back into your main class, PlayerEvolutions.java, and before the MinecraftForge.EventBus line add this:
RegistryHandler.init();
Make sure to import your RegistryHandler class.
Not sure where to add this line?
@Mod("playerevolutions")
public class PlayerEvolutions {
    private static final Logger LOGGER = LogManager.getLogger();
    public static final String MOD_ID = "playerevolutions";

    public ModWorkshop() {
        FMLJavaModLoadingContext.get().getModEventBus().addListener(this::setup);
        FMLJavaModLoadingContext.get().getModEventBus().addListener(this::doClientStuff);
        RegistryHandler.init(); // here
        MinecraftForge.EVENT_BUS.register(this);
    }
Part 3: Coding your first item!
The boring registry stuff is out of the way. Now, we can start the fun part: adding items to the game.
Go into the RegistryHandler.java class. Inside the class, but after the init() method, add:
public static final RegistryObject<Item> RUBY = ITEMS.register("ruby", ItemBase::new);
Use Alt + Enter to import RegistryObject. You'll get an error on ItemBase because that is referencing a class that we haven't created yet.
Here's what your RegisteryHandler class should look like so far:
package com.username.playerevolutions.util;

import com.username.playerevolutions.PlayerEvolutions;
import net.minecraft.block.Block;
import net.minecraft.item.Item;
import net.minecraftforge.fml.RegistryObject;
import net.minecraftforge.fml.javafmlmod.FMLJavaModLoadingContext;
import net.minecraftforge.registries.DeferredRegister;
import net.minecraftforge.registries.ForgeRegistries;

public class RegistryHandler {
    public static final DeferredRegister<Item> ITEMS = new DeferredRegister<>(ForgeRegistries.ITEMS, ModWorkshop.MOD_ID);
    public static void init() {
        ITEMS.register(FMLJavaModLoadingContext.get().getModEventBus());
    }
    public static final RegistryObject<Item> RUBY = ITEMS.register("ruby", ItemBase::new);
}
Now, let's fix that ItemBase error by creating our ItemBase class.
- Find the directory called
itemsin your left sidebar. - Right-click it and create a new class. Call it
ItemBase.
Once, you're inside the ItemBase class:
-
First add
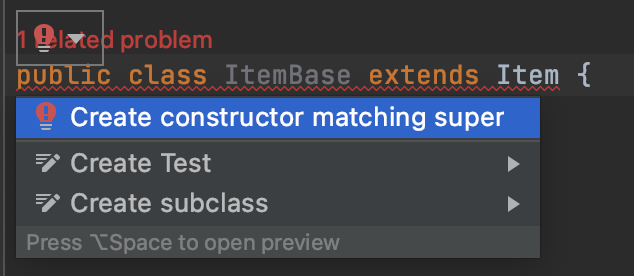
extends Itemat the end of the class name.public class ItemBase extends Item { } -
Import
Itemfromnet.minecraft.item.Item. -
Once you do this, you will see an error. Click on the red light bulb (you may have to hover near the left of the line to see it). Then click "Create constructor matching super".
-
IntelliJ should automatically add a few new lines of code:
public class ItemBase extends Item { public ItemBase(Properties properties) { super(properties); } } -
Inside the parentheses of the
ItemBaseconstructor, removeProperties properties. -
Within the
super()method, removepropertiesand add this line:super(new Item.Properties().group(PlayerEvolutions.TAB)); -
Import everything that it prompts you to import. You will see an error on
TABbecause we haven't made a TAB for our item yet.
Once you've done this, here's what the whole ItemBase class should look like:
package com.yourusername.playerevolutions.items;

import net.minecraft.item.Item;
import net.minecraft.item.ItemGroup;
import com.yourusername.playerevolutions.PlayerEvolutions;

public class ItemBase extends Item {

    public ItemBase() {
        super(new Item.Properties().group(PlayerEvolutions.TAB));
    }
}
Now, go back to the RegistryHandler class and hit Alt + Enter to import ItemBase.
A tab in Minecraft is where you will find the item in creative mode. To fix the error, go back into your main class, PlayerEvolutions.java, and add this at the bottom of the class:
public static final ItemGroup TAB = new ItemGroup("playerEvolutions") {
    @Override
    public ItemStack createIcon() {
        return new ItemStack(RegistryHandler.RUBY.get());
    }
};
Import anything you need to import.
Part 4: Making Item Textures
Find the file called en_US.json in src/main/resources/lang. Open the file. Inside, add:
{
  "item.playerevolutions.ruby": "Ruby",
  "block.playerevolutions.ruby_block": "Block of Ruby",
  "itemGroup.playerevolutions": "Player Evolutions"
}
Next, find the file called ruby.json in the models/item directory.
Inside the file, add:
{
  "parent": "item/generated",
  "textures": {
    "layer0": "playerevolutions:items/ruby"
  }
}
All this is doing is telling Forge that the item only has one layer.
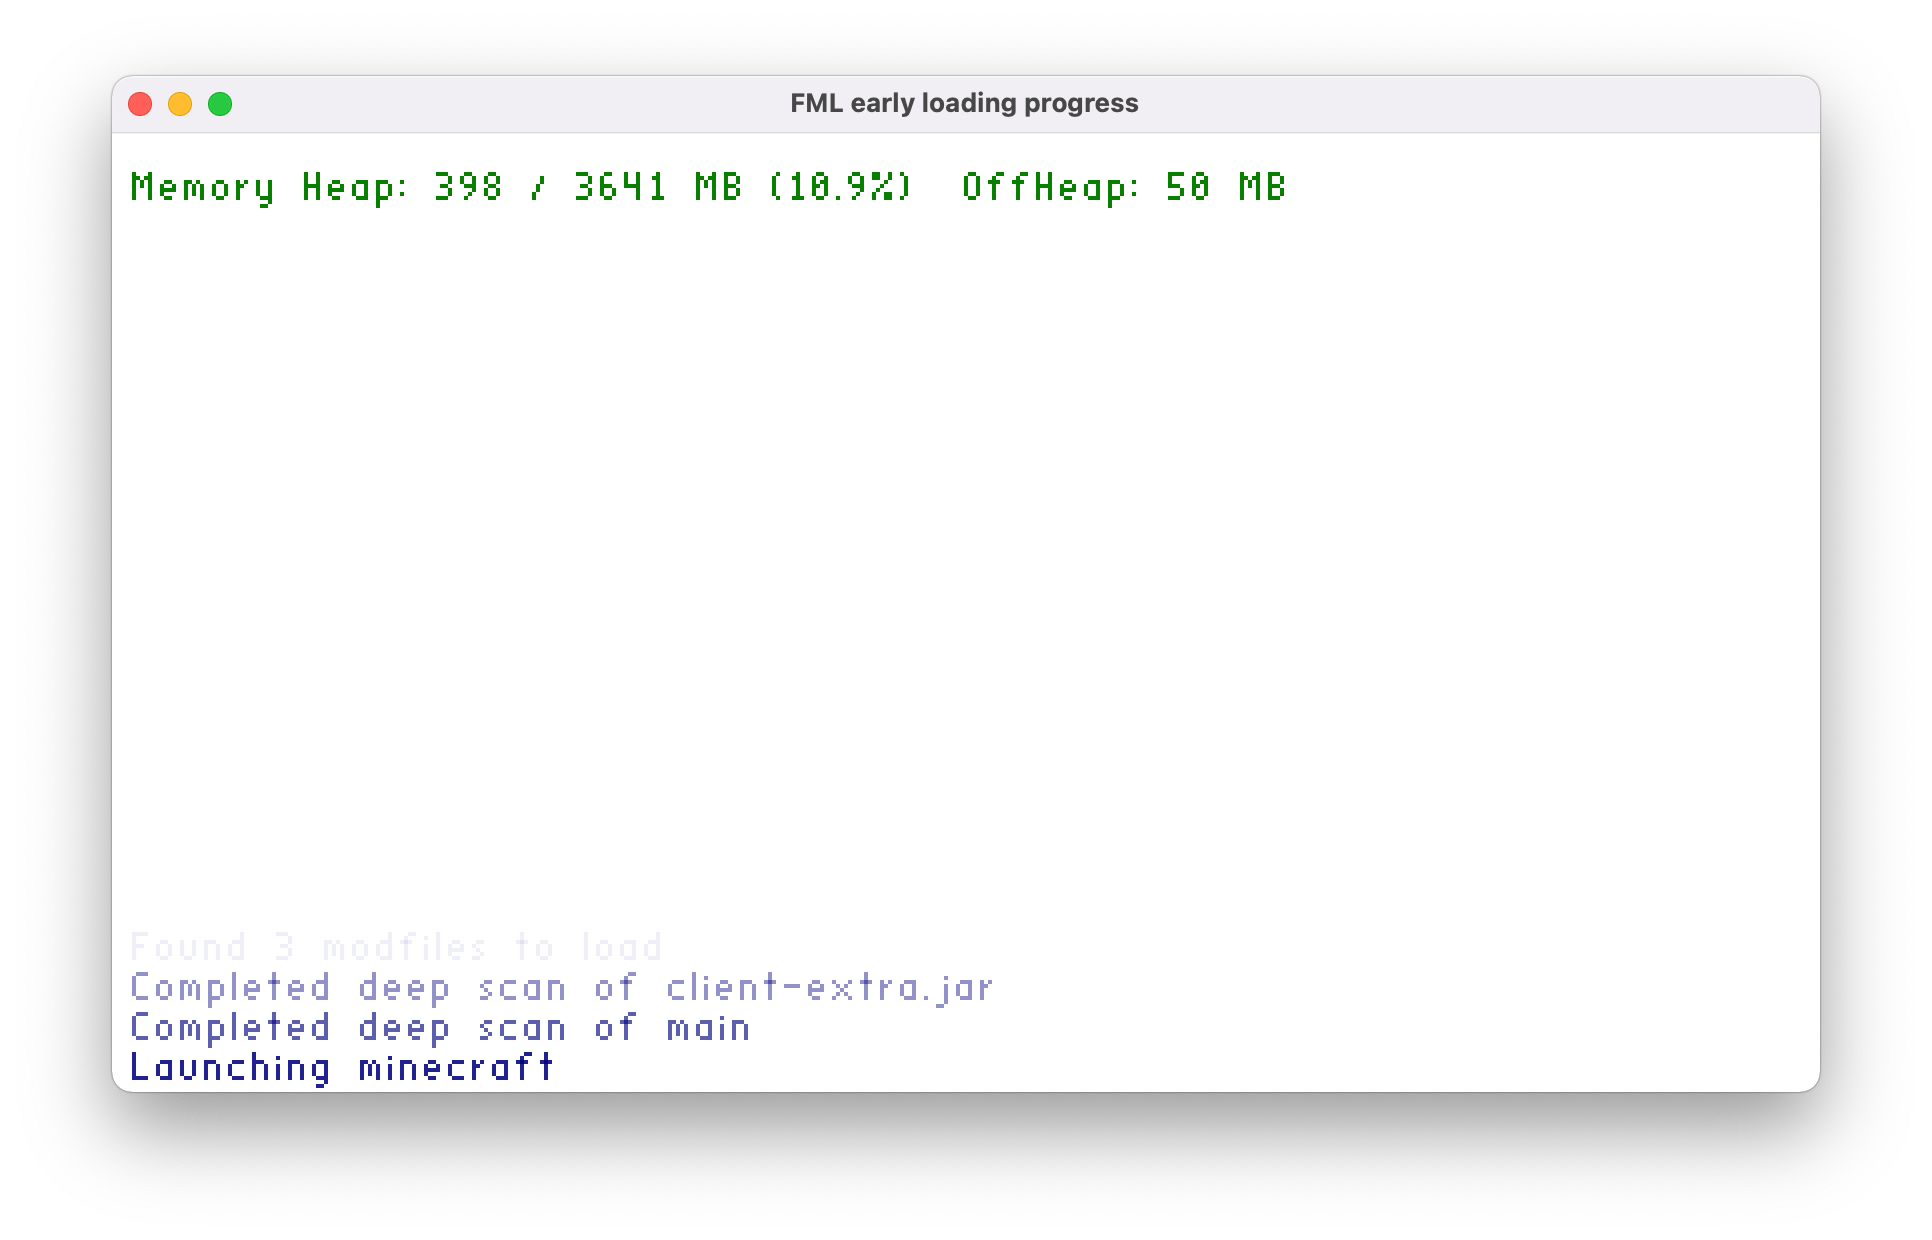
Now run Minecraft using Shift-F10 or the triangle play button and see your item in Minecraft!
Part 5: Making your first block!
Making your first block is actually very simple now that we have most of the files and registries made.
Open the RegistryHandler.java file. Inside of that we are going to use the same methods from before but change them up a little.
First, copy the line that has DeferredRegister in it and paste it right under. Replace <Item> with <Block>, and both instances of ITEMS with BLOCKS.
public static final DeferredRegister<Item> ITEMS = new DeferredRegister<>(ForgeRegistries.ITEMS, PlayerEvolutions.MOD_ID);
public static final DeferredRegister<Block> BLOCKS = new DeferredRegister<>(ForgeRegistries.BLOCKS, PlayerEvolutions.MOD_ID);
When you import Block, make sure you're importing the one from Minecraft, not from anywhere else.
Next, find the line that contains RegistryObject<Item> and add this right under:
public static final RegistryObject<Block> RUBY_BLOCK = BLOCKS.register("ruby_block", RubyBlock::new);
Finally, under that, create another RegistryObject<Item>, like so:
public static final RegistryObject<Item> RUBY_BLOCK_ITEM = ITEMS.register("ruby_block", () -> new BlockItemBase(RUBY_BLOCK.get()));
Here's what your RegistryHandler class should look like now:
public class RegistryHandler {
    public static final DeferredRegister<Item> ITEMS = new DeferredRegister<>(ForgeRegistries.ITEMS, PlayerEvolutions.MOD_ID);
    public static final DeferredRegister<Block> BLOCKS = new DeferredRegister<>(ForgeRegistries.BLOCKS, PlayerEvolutions.MOD_ID);

    public static void init() {
        ITEMS.register(FMLJavaModLoadingContext.get().getModEventBus());
        BLOCKS.register(FMLJavaModLoadingContext.get().getModEventBus());
    }

    public static final RegistryObject<Item> RUBY = ITEMS.register("ruby", ItemBase::new);
    public static final RegistryObject<Block> RUBY_BLOCK = BLOCKS.register("ruby_block", RubyBlock::new);
    public static final RegistryObject<Item> RUBY_BLOCK_ITEM = ITEMS.register("ruby_block", () -> new BlockItemBase(RUBY_BLOCK.get()));
}
You will see errors on RubyBlock and BlockItemBase. We'll create those later.
Next, find the directory called blocks. Right-click on it and create two classes:
BlockItemBaseRubyBlock
Open the BlockItemBase class and add this:
public class BlockItemBase extends BlockItem {
  public BlockItemBase(Block block) {
    super(block, new Item.Properties().group(PlayerEvolutions.TAB));
  }
}
Next, open the RubyBlock class. Add this:
public class RubyBlock extends Block {
  public RubyBlock() {
    super(Block.Properties.create(Material.IRON)
      .harvestTool(ToolType.PICKAXE)
    );
  }
}
The super() line sets the "type" of block that your new block is. .harvestTool() sets the type of tool that it can be mined with. You can set these to any material in the game (if you type Material. or ToolType., IntelliJ will suggest every available item in the game).
Now, go back to the RegistryHandler class and use Alt + Enter to import these two new classes and fix the errors.
Part 6: Block Textures
We're almost done! The final step is to add our block texture to the game.
Find the file called ruby_block.json in the folder called blockstates. Inside, add:
{
  "variants": {
    "": { "model": "playerevolutions:block/ruby_block" }
  }
}
Next, find the file called ruby_block.json in the folder called models/block. Inside, add:
{
  "parent": "block/cube_all",
  "textures": {
    "all": "playerevolutions:blocks/ruby_block"
  }
}
Finally, find the file called ruby_block.json in models/item. Inside, add:
{
  "parent": "playerevolutions:block/ruby_block"
}
That's it! If you start the test Minecraft client, you should see your mod in action 😎
Note: we used predefined textures that came as part of the starter project for the item and block textures. You can find those files in resources/textures. When you make a mod on your own, you'll have to define your own textures. You can do it pretty easily in Paint or a pixel art maker. The only requirement is that it needs to be 16x16!
Hacking
The fun doesn't stop here. Here are a few examples & demos of other things you can do:
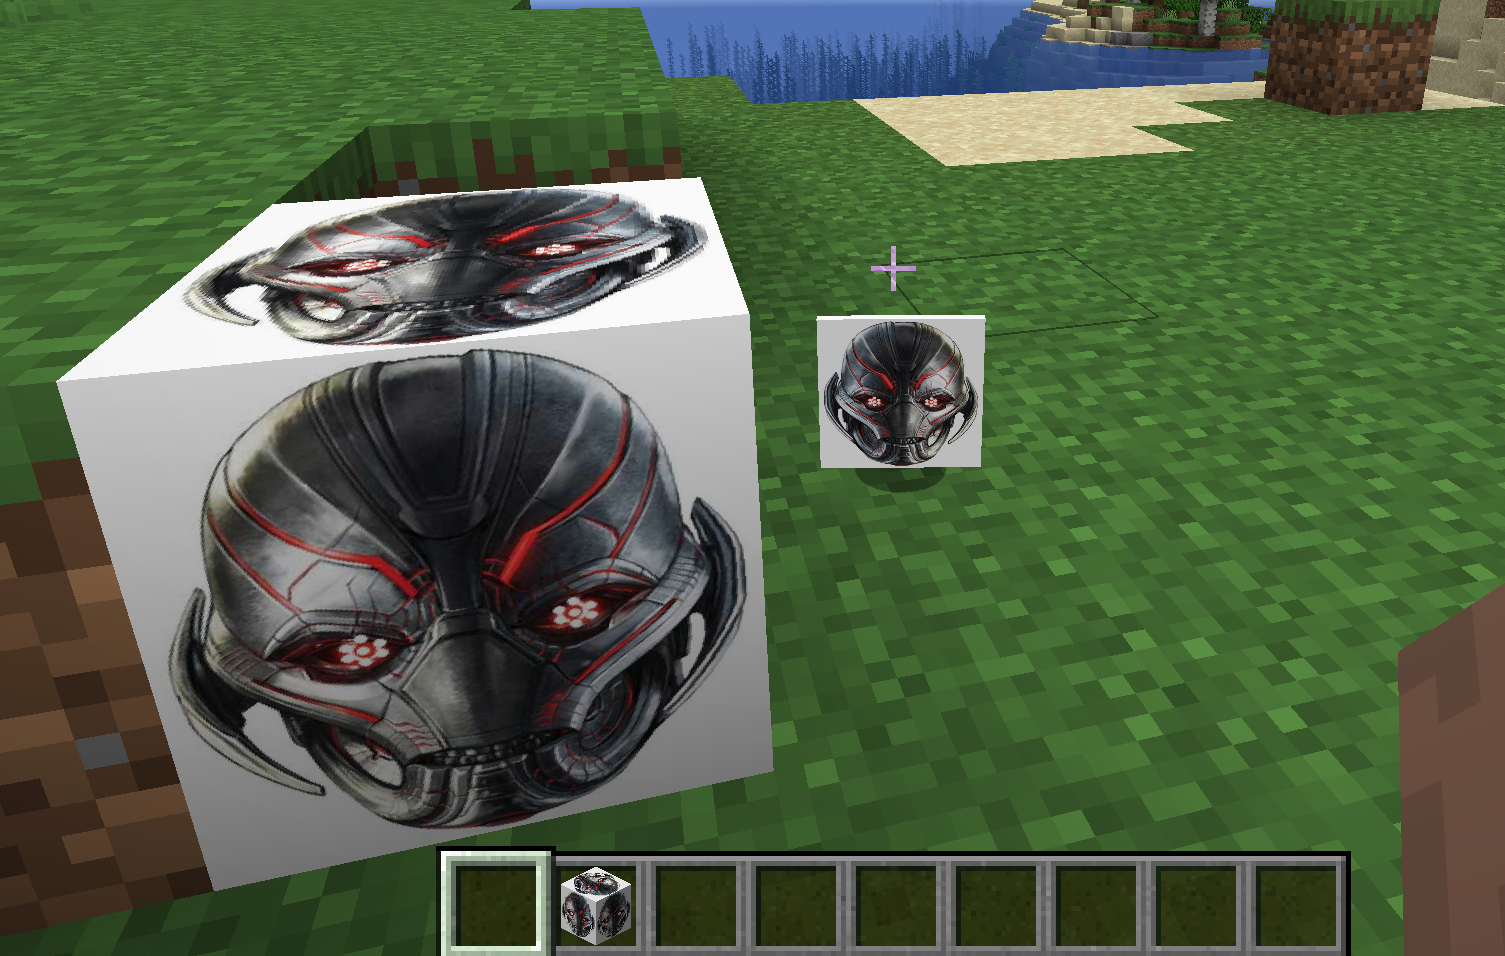
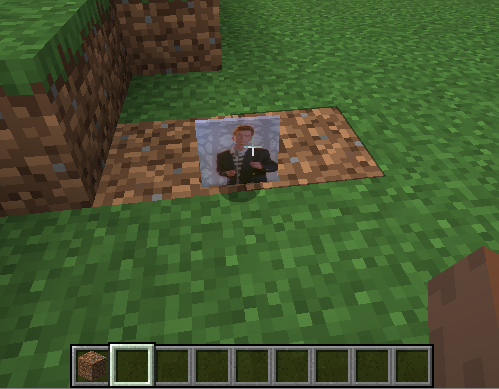
Happy hacking!