

Java has earned a bit of a negative reputation among young people. After all, many college classes and even AP Computer Science in high schools introduce beginners to the world of programming by teaching them how to write boring, outdated desktop applications using Java. But just because computer science classes make Java boring doesn't mean it has to be! In this workshop, you're going to use Java as a tool for creative coding in the web by coding your own pixel art pad.
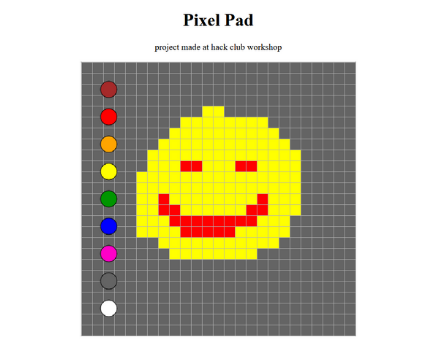
Here's what it'll look like:
![]()
This workshop will take about 45 minutes to complete.
Part 1: A Disclaimer
Before we begin, an important disclaimer. Listen up, especially if you're new to coding!
The point of this workshop is to have a little fun with Java by making something fun in the browser with it. In order to do this, we're going to have to use Java in ways it's not supposed to be used and employ some very bad practices. You should not write websites and web apps in Java. Developers write code for the web using another language called JavaScript, which, despite its name sounding similar to Java, is a completely different language. JavaScript is a scripting language for adding functionality to websites, intended to be run in the browser; Java is a language intended for writing more complex applications, like desktop apps.
We're breaking the rules in this workshop—but breaking the rules without fully understanding them first is dangerous and can potentially be a major source of confusion in your programming journey in the future. So, if you're a beginner doing this workshop alone, I recommend first trying some other workshops that make similarly-cool projects without employing bad practices. You can see some of my favorites by expanding the dropdown under this paragraph. If you're a club leader running this workshop for beginners, make sure you know what you're doing.
Some other great creative coding workshops:
Now that that's out of the way, let's get started!
Part 2: Prerequisites
This workshop assumes you have a basic understanding of Java, including:
- the concept of object-oriented programming and how you can work with objects in Java
- defining a class and constructor
- methods and return types
I've included some snippets explaining some Java concepts that we run into throughout in case you're a little rusty, but if you don't have a basic understanding of these concepts, you may get lost.
It also helps to have a basic understanding of HTML, but it's not required.
We will be using a library called Processing.js, which makes it super easy to write creative code on the web.
Part 3: Getting started
Setting up Repl.it
We're going to be writing our code in an online code editor called Repl.it. To get started, go to https://repl.it/languages/html. Your coding environment will be created in a few moments.
Once your repl is setup, you are all set to continue!
Part 4: Setting Up The Required Files
1) Deleting unnecessary files
When your repl starts up, you should see 3 files on the sidebar to the left: index.html, style.css, and script.js. Delete style.css and script.js. We're not going to be using them for this workshop.
2) Creating the Java file
As mentioned earlier, we're going to be writing the functionality for the pixel art pad in Java. So, let's create a file called index.java by clicking the "new file" icon at the top of the sidebar.
You should now have two files called index.html and index.java.
Part 5: Building The Pixel Art Pad
1) index.html
First, let's write the required HTML code for the pixel art pad. Repl.it should have already added some starter code to the index.html file:
<!DOCTYPE html>
<html>
  <head>
    <meta charset="utf-8">
    <meta name="viewport" content="width=device-width">
    <title>repl.it</title>
    <link href="style.css" rel="stylesheet" type="text/css" />
  </head>
  <body>
    <script src="script.js"></script>
  </body>
</html>
Replace the text inside the <title> tag to the title you want. In my case, I am replacing it with:
<title>Pixel Art Pad</title>
Next, since we're not going to be writing CSS in this workshop, you can remove the line that links the CSS file to the HTML file. Delete the line that looks like this:
<link href="style.css" rel="stylesheet" type="text/css" />
Similarly, since we no longer have a JavaScript file to link, you can also remove this line:
<script src="script.js"></script>
Finally, go ahead and delete everything between the <body> </body> tags and replace it with:
<body>
  <center>
    <h1>Pixel Art Pad</h1>
    <br>
    <canvas data-processing-sources="index.java"></canvas>
  </center>
  <script src="https://cdnjs.cloudflare.com/ajax/libs/processing.js/1.6.6/processing.min.js"></script>
</body>
Here, we're:
- adding a heading (
<h1>) to the top of the page - adding a line break (
<br>) - creating an HTML Canvas and linking our Java file to it (this is where our pixel art pad will appear!)
- wrapping everything in a
<center>tag so that we can center everything without having to write CSS.<center>is an obsolete element and you should not use it in your own projects, but in the spirit of hacking our way to a solution without considering bad practice, we're using it in this project. - importing the Processing.js library, which we'll use to create our pixel art pad
Final index.html code:
<!DOCTYPE html>
<html>
  <head>
    <meta charset="utf-8">
    <meta name="viewport" content="width=device-width">
    <title>Pixel Art Pad</title>
  </head>
  <body>
    <center>
      <h1>Pixel Art Pad</h1>
      <br>
      <canvas data-processing-sources="index.java"></canvas>
    </center>
    <script src="https://cdnjs.cloudflare.com/ajax/libs/processing.js/1.6.6/processing.min.js"></script>
  </body>
</html>
And that's it! We have completed writing our HTML.
2) index.java
The Tile class
Now that we've written our HTML, it's time to write the Java code that will bring our pixel art pad to life.
In the index.java file, create a class called Tile with the following code:
class Tile
{
  int x, y;
  color color;

  boolean spread;

  Tile(int x, int y, int color)
  {
    this.x = x;
    this.y = y;
    this.color = color;

    spread = false;
  }
}
Here, we're setting up that the Tile class needs to be initialized with two integer variables x and y, a variable that sets a color, and a boolean variable.
In case you're new to Java: the weird function-looking thing that starts with Tile(int x, int y, int color) is called a constructor.
Under the Tile constructor, but inside the Tile class, create a method called Display().
void Display()
{
  fill(color);

  if (!show) noStroke();
  else stroke(180);

  rect(x * 20, y * 20, 20, 20);
}
This method uses some handy functions—fill(), noStroke(), stroke(), and rect()—from the Processing.js library to display a tile. As a general rule throughout this workshop, if you see a random function that you haven't previously written suddenly appear in the code, it's probably from Processing.js. I recommend having the Processing.js documentation open in another tab so that you can find out what each function does if you're curious.
If you're new to Java:
All Java methods must specify a "return type", or the type of variable that the function will "return" once completed. For example, if you wanted to write a method that would add two numbers, here's how it would look:
int addNumbers(int a, int b) {
  return a + b // since a and b are integers, the return type is also an integer, which is consistent with the return type we declared
}
And if you wanted to write a method that combined two strings, it would look something like this:
String combineStrings(String a, String b) {
  return a + b
}
Our Display() function's return type is void, which means it doesn't return anything.
Specifying the grid size
And with that, your Tile class is completed! Now, let's work with it.
After the end of the Tile class, add:
Tile grid[][] = new Tile[25][25];
This initializes a square grid of 25x25 tiles. Once you finish this workshop, though, come back and try changing these numbers!
Specifying the colors in color palette

Let's add the color options we'll want to use for the pixel art pad. I'll give you 9 colors to start with, but I recommend choosing your own colors! Google "rgb color picker" and you'll find a tool that lets you pick a color and get its RGB value.
Under the Tile object, add:
color colors[] = {
  color(165, 42, 42),
  color(255, 0, 0),
  color(255, 165, 0),
  color(255, 255, 0),
  color(0, 150, 0),
  color(0, 0, 255),
  color(255, 0, 200),
  color(100),
  color(255)
};

color selected = color(255);
boolean show = true;
the setup() function
Processing includes two main functions:
setup(), which is run once when you first run your code and is meant for setting up your canvasdraw(), which runs continuously and is meant for making things happen on your canvas
After the previous bit of code you just wrote, add:
void setup()
{

}
Now, let's initialize the tiles on our canvas:
void setup()
{
  size(500, 500);

  for (int a = 0; a < grid.length; ++a)
  {
    for (int b = 0; b < grid[a].length; ++b)
      grid[a][b] = new Tile(a, b, color(100));
  }
}
In this code:
- First, we set the size of the canvas—500 pixels by 500 pixels. You're welcome to change this if you want!
- Then, we loop through the grid of
Tiles we just created and add a newTileobject, colored gray.
The draw() function
Under the setup() function, add the draw() function:
void draw()
{

}
Then, inside the function, add the following code:
void draw()
{
  for (int a = 0; a < grid.length; ++a)
  {
    for (int b = 0; b < grid[a].length; ++b)
      grid[b][a].Display();
  }

  if (show)
  {
    for (int a = 0; a < colors.length; ++a)
    {
      fill(colors[a]);
      stroke(0);
      ellipse(50, (a * 50) + 50, 30, 30);
    }
  }
}
Remember, the draw() function runs continuously. In here, we're calling the Display() method on each Tile. Then, we display each color option near the left of the canvas.
Responding to mouse input
When the user clicks a tile, they want one of two things:
- to select a color
- to draw on a tile
Let's write some code that draws on a tile when the user clicks on it. At the end of the draw() function, but before its closing brace, add the following code:
if (mousePressed && mouseButton == LEFT)
{
  for (int a = 0; a < grid.length; ++a)
  {
    for (int b = 0; b < grid[a].length; ++b)
    {
      if (mouseX >= (b * 20) && mouseX <= 20 + (b * 20) && mouseY >= (a * 20) && mouseY <= 20 + (a * 20))
      {
        if (show)
        {
          for (int c = 0; c < colors.length; ++c)
          {
            if (dist(mouseX, mouseY, 50, (c * 50) + 50) <= 30)
              return;
          }
        }

        grid[b][a].color = selected;
      }
    }
  }
}
Wow! Check out all of those for loops and if statements. Look through this piece of code closely. Do you understand what it's doing? It's a little difficult to wrap your head around, so if you don't, stick around and I'll show you how to figure it out.
Selecting a color
We're almost done! There's just one more thing we need to do: right now, you'll be able to draw, but you won't be able to select a color. So, let's add that.
After the draw() function, at the end of the file, add a function called `mousePressed():
void mousePressed()
{

}
mousePressed() is another function Processing.js provides us. The code we write in this function will automatically run whenever it detects that the mouse has been pressed.
Inside the mousePressed() function, add the following code:
void mousePressed()
{
  if (show)
  {
    for (int a = 0; a < colors.length; ++a)
    {
      if (dist(mouseX, mouseY, 50, (a * 50) + 50) <= 30)
        selected = colors[a];
    }
  }
}
Running the code
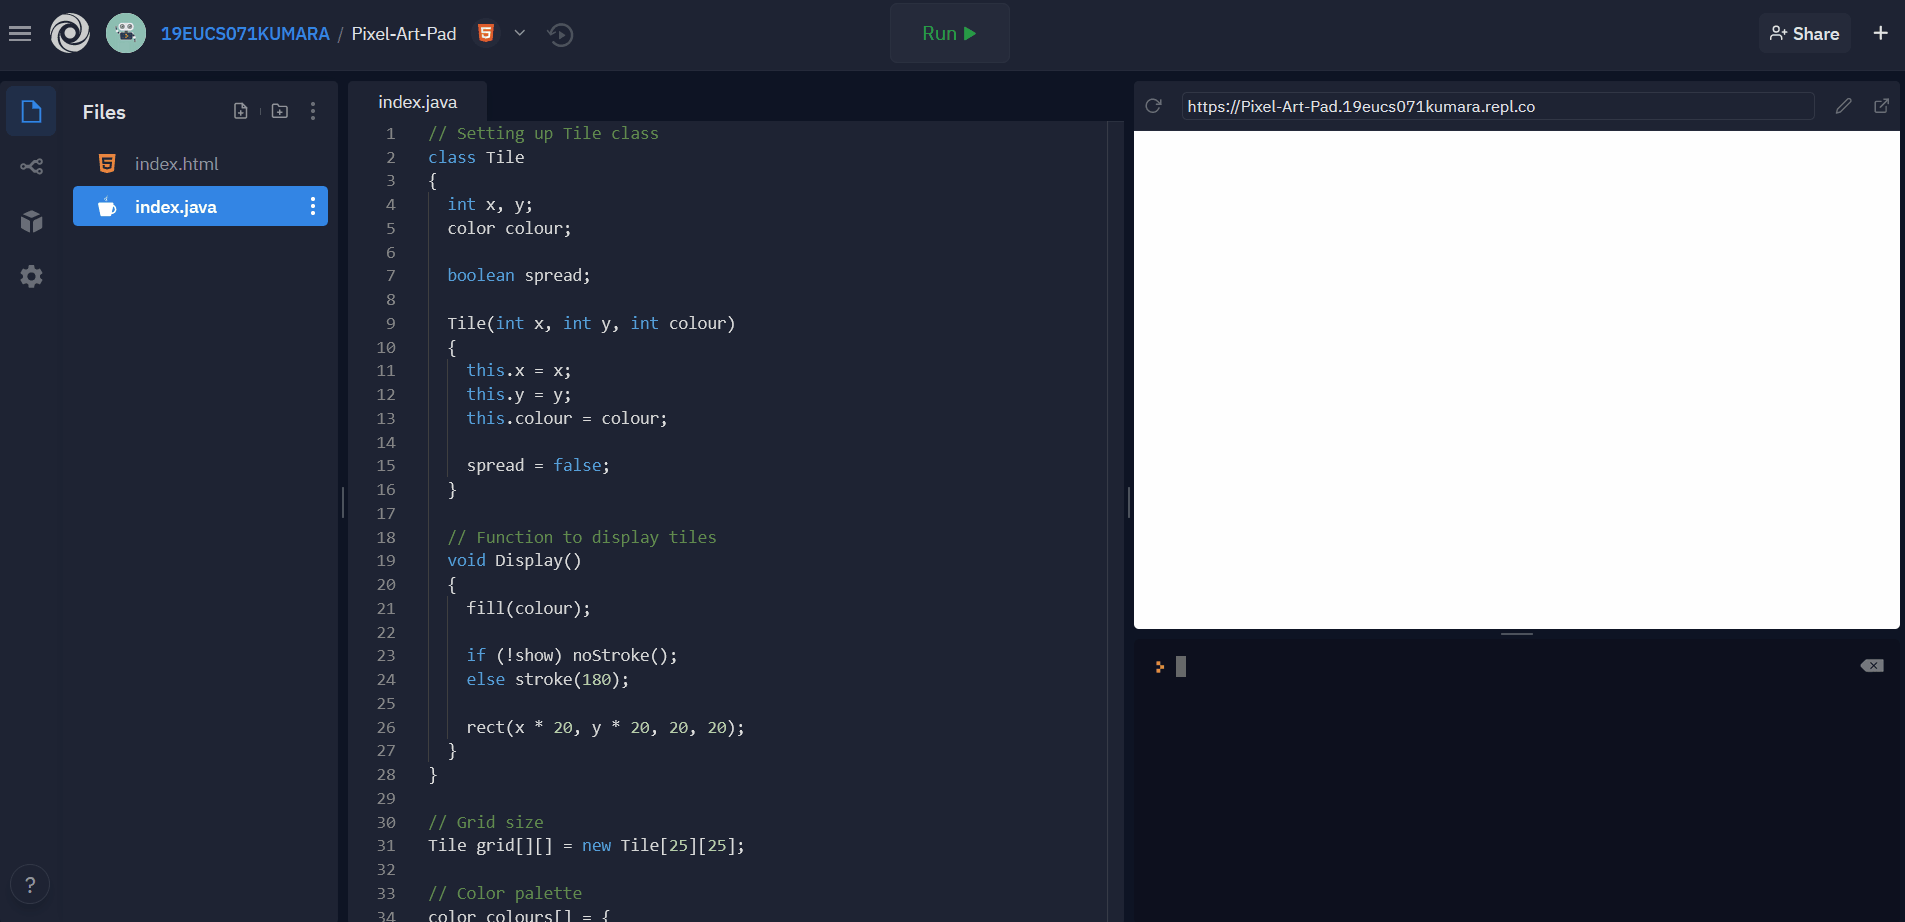
Your final code should look something like this:
// Setting up Tile class
class Tile
{
  int x, y;
  color color;

  boolean spread;

  Tile(int x, int y, int color)
  {
    this.x = x;
    this.y = y;
    this.color = color;

    spread = false;
  }

  // Function to display tiles
  void Display()
  {
    fill(color);

    if (!show) noStroke();
    else stroke(180);

    rect(x * 20, y * 20, 20, 20);
  }
}

// Grid size
Tile grid[][] = new Tile[25][25];

// Color palette
color colors[] = {
  color(165, 42, 42),
  color(255, 0, 0),
  color(255, 165, 0),
  color(255, 255, 0),
  color(0, 150, 0),
  color(0, 0, 255),
  color(255, 0, 200),
  color(100),
  color(255)
};

color selected = color(255);
boolean show = true;

// Setting up the canvas size
void setup()
{
  size(500, 500);

  for (int a = 0; a < grid.length; ++a)
  {
    for (int b = 0; b < grid[a].length; ++b)
      grid[a][b] = new Tile(a, b, color(100));
  }
}

void draw()
{
  for (int a = 0; a < grid.length; ++a)
  {
    for (int b = 0; b < grid[a].length; ++b)
      grid[b][a].Display();
  }

  if (show)
  {
    for (int a = 0; a < colors.length; ++a)
    {
      fill(colors[a]);
      stroke(0);
      ellipse(50, (a * 50) + 50, 30, 30);
    }
  }


  // Function for painting with mouse press
  if (mousePressed && mouseButton == LEFT)
  {
    for (int a = 0; a < grid.length; ++a)
    {
      for (int b = 0; b < grid[a].length; ++b)
      {
        if (mouseX >= (b * 20) && mouseX <= 20 + (b * 20) && mouseY >= (a * 20) && mouseY <= 20 + (a * 20))
        {
          if (show)
          {
            for (int c = 0; c < colors.length; ++c)
            {
              if (dist(mouseX, mouseY, 50, (c * 50) + 50) <= 30)
                return;
            }
          }

          grid[b][a].colors = selected;
        }
      }
    }
  }

}
void mousePressed()
{
  if (show)
  {
    for (int a = 0; a < colors.length; ++a)
    {
      if (dist(mouseX, mouseY, 50, (a * 50) + 50) <= 30)
        selected = colors[a];
    }
  }
}
And with that, you've finished! Run the code by clicking the green "Run" button at the top of your repl. If all goes well, you should see something like this:
If you don't see it, that's okay! There are a bunch of tiny mistakes that break everything. Take a few minutes to debug your code. If you're having trouble figuring it out, ask your club leader.
Protip: I recommend opening the website in a few tab for the full effect. You can do so by clicking the button with a box and an arrow at the top right of your website preview.
So now that it's running, what's the deal with those big code blocks that are difficult to understand? If you haven't figured out how they work yet, now's the time to figure it out! Start by commenting out all of the code inside the if statement that starts with (mousePressed && mouseButton == LEFT) and run the program. Then, comment out all of the code in the mousePressed() function and see what happens. Then, comment out individual lines and if statements.
Part 6: The End
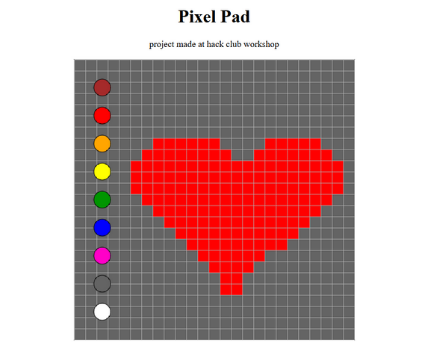
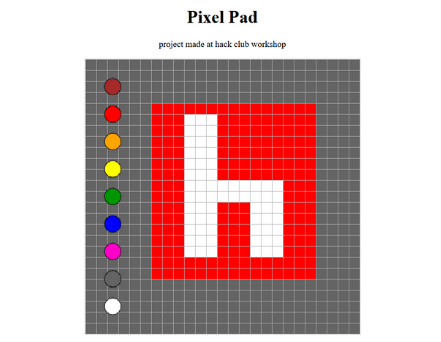
Congrats! You've built your own pixel art pad in the web using Java! Crazy, right?

Take a few minutes to play around and make your own pixel art. Then share it with the rest of your club. Here are a few things I made:

What's next? 🚀

Now that you've finished, make it your own! Here are a few things you could work on to expand this project:
- Add an erase feature
- Add a download button to download the pixel art as an image
- More colors or a custom color palette
- Custom CSS styles to make the color palette look more attractive
- Add a clear button to clear the drawing from the grid
Once you've finished, join the Hack Club Slack (if you aren't there already) and share your work in the #scrapbook channel!