

Creating mockups for websites manually can be pretty time-consuming. In this workshop, we're going to make it easy by writing our own website mockup generator with HTML, CSS, and JavaScript!
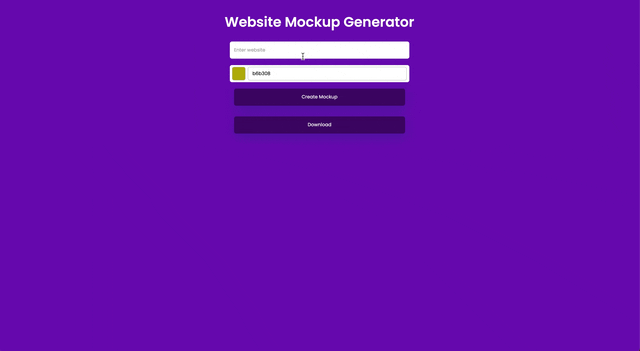
Here's what it'll look like:
Part 1: Prerequisites
It is recommended to have a basic understanding of:
- HTML
- JavaScript
Part 2: Getting started
Setting up Repl.it
We're going to be using Repl.it, an online code editor, to write this project. To get started, click here to open the starter project. Then, click the "Fork" button at the top to edit the file.
In order to keep it tight, we're not going to be writing any CSS for this workshop. If you click on style.css, you'll notice that the starter code comes with a fully-written CSS file. However, I highly recommend playing around with the CSS after this workshop, and making it totally your own!
Part 3: Building The Website Mockup Generator
Once your repl spins, up, you're ready to get going!

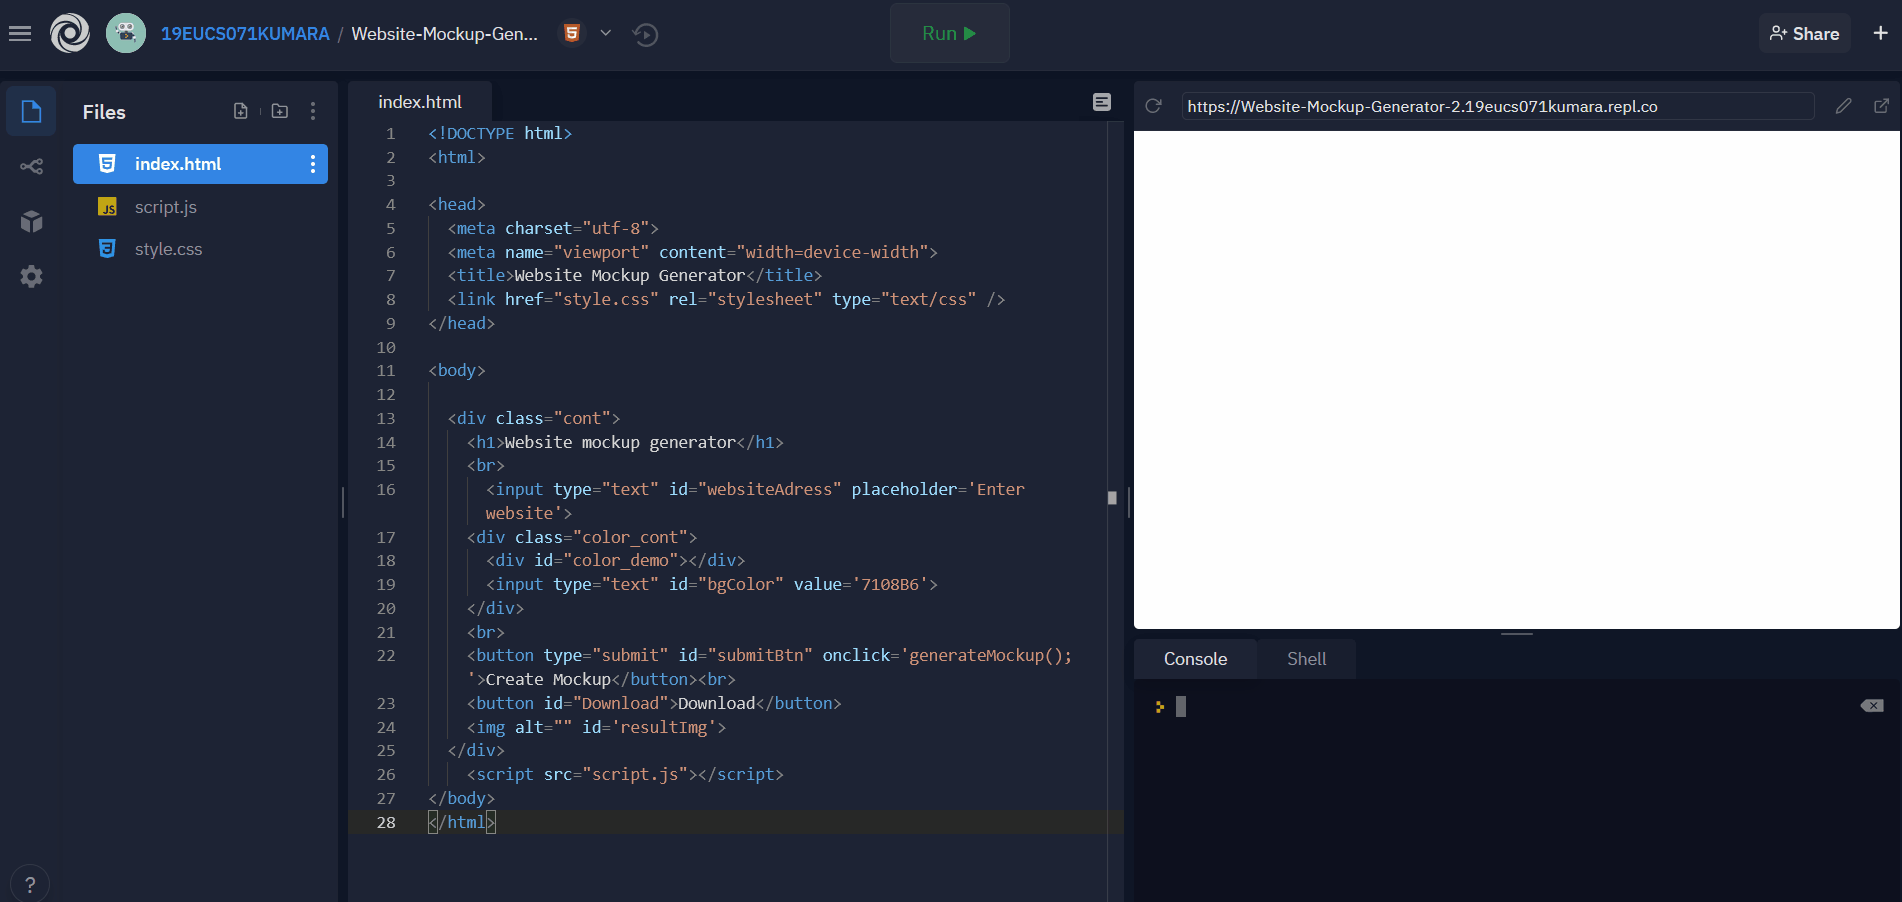
1) index.html
We'll start by writing some HTML that will make the front-end of our website mockup generator.
The site title
In between the <head> </head> tags, Replace the text inside the title tag to the title you want. In my case, I am replacing it with 'Website Mockup Generator'.
<title>Website Mockup Generator</title>
The heading
Next, let's add a heading to the website. Add the following code in between the <body> </body> tags:
<body>
  <!-- the rest of the code repl.it put in here for you !-->
  <h1>Website Mockup Generator</h1>
</body>
Placing a text input field
Next, let's add an input field where the user will input the website they want to create a mockup of. Under the <h1> tag you wrote, add the following code:
<input type="text" id="websiteAddress" placeholder="Enter the website">
Here, we're:
- creating an
<input>, typetext. - We give it an ID
websiteAddress(we'll use this later, when styling the HTML). - We add placeholder text that says 'Enter the website'. On the HTML page, this will appear as faded gray text in the background, and it will disappear as soon as the user starts typing.
Divs!
Next, we're going to create some <div> elements. You can think of a <div> as a container for other HTML elements. It's useful if you want to style multiple elements in a particular website—which is exactly why we're adding <div>s here :)
Under the <input> tag you just wrote, add:
<div class="color_cont">

</div>
Then, inside this <div>, add another <div>:
<div class="color_cont">
  <div class="color_demo"></div>
</div>
The color_demo div is a little weird—after all, didn't I just say that divs are useful for nesting other elements inside? So why are we immediately closing? You'll find out the answer to that in a minute!
Color input
Now, we need to add a second input for selecting a color. After the color_demo div, but inside the color_cont div, add:
<div class="color_cont">
  <div class="color_demo"></div>
  <input type="text" id="bgColor" value="b6b308">
</div>
This input has type text, id bgColor, and a default value of b6b308, which is a mustard yellow. You'll see the purpose this serves in a minute!
Placing the buttons
Next, we need to add two buttons—one for generating the mockup, and one to download the mockup. Under the color_cont div, add the following code:
<button type="submit" id="submitBtn" onclick="generateMockup()">Generate Mockup</button>
<button id="Download">Download</button>
You'll notice that the first button includes an attribute called onclick. This is an Event that runs the function generateMockup() when it detects that the button has been clicked. We haven't written the generateMockup() function yet, but we will in a few minutes!
Displaying the image
Next, we want to display the final mockup to the user once it has been generated. We'll have to do some JavaScript magic in order to make this work, but for now, add the following code under the two buttons you just wrote:
<img id="resultImg">
Note: img tags in HTML don't require a closing tag.
The parent div
Now, take all of the HTML code you've written and wrap it in between a big <div> with a class cont:
<div class="cont">
  <h1>Website Mockup Generator</h1>
  <input type="text" id="websiteAddress" placeholder="Enter the website">
  <div class="color_cont">
    <div id="color_demo"></div>
    <input type="text" id="bgColor" value="b6b308">
  </div>
  <button type="submit" id="submitBtn" onclick="generateMockup();">Create Mockup</button><br>
  <button id="Download">Download</button>
  <img id="resultImg">
</div>
Final index.html code:
Nice! You've now written all of the HTML you need for this workshop.
Here's what your HTML file should look like now:
<!DOCTYPE html>
<html>
  <head>
    <meta charset="utf-8">
    <meta name="viewport" content="width=device-width">
    <title>Website Mockup Generator</title>
    <link href="style.css" rel="stylesheet" type="text/css" />
  </head>

  <body>
    <div class="cont">
      <h1>Website Mockup Generator</h1>
      <input type="text" id="websiteAddress" placeholder="Enter the website">
      <div class="color_cont">
        <div id="color_demo"></div>
        <input type="text" id="bgColor" value="b6b308">
      </div>
      <button type="submit" id="submitBtn" onclick="generateMockup();">Create Mockup</button><br>
      <button id="Download">Download</button>
      <img id="resultImg">
    </div>
    <script src="script.js"></script>
  </body>
</html>
Want to see what it looks like so far? Click the green "Run" button at the top of your repl. Here's what it should look like:
2) script.js
Now that you've written all of the frontend code for this project, it's time to write some JavaScript and make it work!
Here's what we'll want our JavaScript code to be able to do at the end:
- Get the website address from the text input
- Generate a mockup for the website when the user presses the 'Generate Mockup' button
- Display the mockup as an image
- Allow users to download the image by pressing 'Download' button
Getting HTML elements in JavaScript
One cool thing about JavaScript is that you can find certain elements on the HTML page and manipulate them with JavaScript 🤯 Let's write some code to do that. Navigate to your script.js file and add the following code:
const resultImg = document.getElementById("resultImg");
const Download = document.getElementById("Download");
Remember the HTML elements we wrote with IDs resultImg and Download? Well, now we can work with those elements in our JavaScript code!
generateMockup()
Now, let's write the function that will generate our mockup. At the bottom of the script.js file, add:
const generateMockup = () => {
  // code here
};
Inside the function, add these two lines:
const websiteAddress = document.getElementById("websiteAddress").value;
const bgColor = document.getElementById("bgColor").value;
- In JavaScript,
constrefers to a variable that is final and will not be changed. - Here, we're getting the value of both of our inputs and assigning them to variables.
Fetching the mockup image
We're going to use a handy tool on the web that generates the mockup image for us. At the bottom of the generateMockup() function, add:
const mockup = 'https://2s9e3bif52.execute-api.eu-central-1.amazonaws.com/production/screenshot?url=' + websiteAddress + '&color=' + bgColor;
This looks a little complicated, but really it's just taking the URL of the service we're using to generate the image and appending our data to it.
Protip: if you want to see the resulting URL, you can add console.log(mockup) on the line directly under this one.
Note: this "service" is called an API. Understanding what APIs are and how they work is beyond the scope of this workshop, but there are some other fantastic workshops that introduce the concept of APIs!
Now, we're going to do something crazy: we're going to use JavaScript to modify the src attribute of the img tag we wrote at the beginning of this workshop to contain the url for our mockup. This can be done in just one line, which you should add at the bottom of the generateMockup() function:
resultImg.src = mockup;

Downloading the image
We're almost done! The last thing we need to do is allow users to download their mockup.
At the bottom of the generateMockup() function, add:
Download.addEventListener("click", () => {
  window.open(mockup);
});
This code:
- Attaches an event listener to the
Downloadbutton. Now, the code inside will run when the button is clicked. - Uses
window.open()to download the file.
Why didn't we add an onclick attribute to the download button?
In case you didn't notice, we're using two different methods of running code when a button is clicked. The first one is to add an onclick attribute to the HTML element that runs a JavaScript function. This is what we did with the submitBtn button. But for the Download button, we skipped that and added the event listener in the JavaScript file. Why?
If you look at the window.open(mockup) line, you'll notice that we're passing in the mockup variable to the function, which contains the mockup image. Because we need to run JavaScript to get the mockup that we need to pass into window.open(), we can't simply call the function in our HTML. If we tried, we wouldn't yet have a mockup image that we could pass in. So, we're attaching the event listener at the end of our generateMockup() function in JavaScript so that we can pass in a valid mockup image.
Yay! you're done!
Here's what your final JavaScript code should look like:
const resultImg = document.getElementById("resultImg");
const Download = document.getElementById("Download");

const generateMockup = () => {
  const websiteAddress = document.getElementById("websiteAddress").value;
  const mockup = 'https://2s9e3bif52.execute-api.eu-central-1.amazonaws.com/production/screenshot?url=' + websiteAddress + '&color=' + bgColor;
  resultImg.src = mockup;

  Download.addEventListener("click", () => {
    window.open(mockup);
  });
};
Part 5: The End
Yay!!! You did it! Check out your final project by pressing the 'Run' button on the top of your repl. You will see the preview of the website mockup generator in the right side pane.
If you want to open the website in a new tab, you can do so by clicking the icon that looks like an arrow coming out of a square at the top right.

Here are some of the mockups I made with this tool.

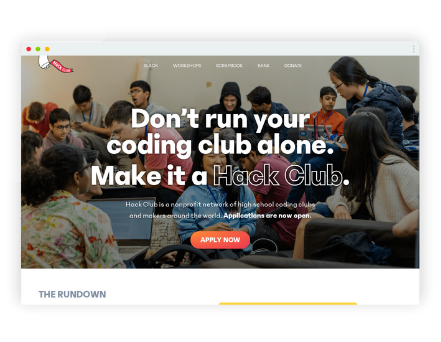
What mockups can you make? Share a few with the rest of your club.
Hacking 🚀

Now it's your turn to play around and make this project your own! Here are a few ways I took this project further:
- A retro style mockup generator
- A minimalistic mockup generator
- A dark themed mockup generator
- Also, right now the colored square in
color_demois hardcoded, so it remains a mustard yellow even when you change the color. Try changing the color of that square based on the color inputted in the color input!
I would love to hear from you and take a look at your own mockup generators! You can share it in the #scrapbook channel on Hack Club Slack or send it to me directly via DM (@Guru). Thanks and happy hacking!